August 4, 2010

Peach Blueberry Pie, Oh My !


It's hard to resist peaches in August! The local farms are bursting at the seams with baskets upon baskets of beautiful, freshly picked, sun ripened peaches. Oh, you gotta love this time of year!

After buying a peck of peaches, I quickly went to my stash of peachy recipes! Ah yes...peach blueberry pie. Fortunately I bought blueberries at the farm also.

Ok, here we go!

First make a double pie crust dough. Here is my recipe that works perfectly every time. Just click this link double-crust-pie-recipe. This recipe is a permanent fixture on my blog. If you ever need it, you can find it right under my header.

Roll out half of pie crust dough.


Roll pie dough onto rolling pin to transfer dough to pie pan. Unroll dough over pie pan and ease dough into pie pan covering bottom and sides of pie pan.


Next, in a small bowl, make a mixture of 3/4 cup sugar, 3 Tbsp. flour, 2 Tbsp. cornstarch, 1/4 tsp. cinnamon, dash of nutmeg, and 1/8 tsp. salt. Mix and set aside.

Wash and drain approx. 2 C. blueberries and dump into crust.


Now sprinkle blueberries with half of the flour, sugar mixture.


Add 3 cups peeled and sliced peaches.


Sprinkle with remaining 1/2 of flour sugar mixture. Also, sprinkle with small handful of brown sugar. (approx. 1/8 c.)


Roll out remaining 1/2 of pie dough.


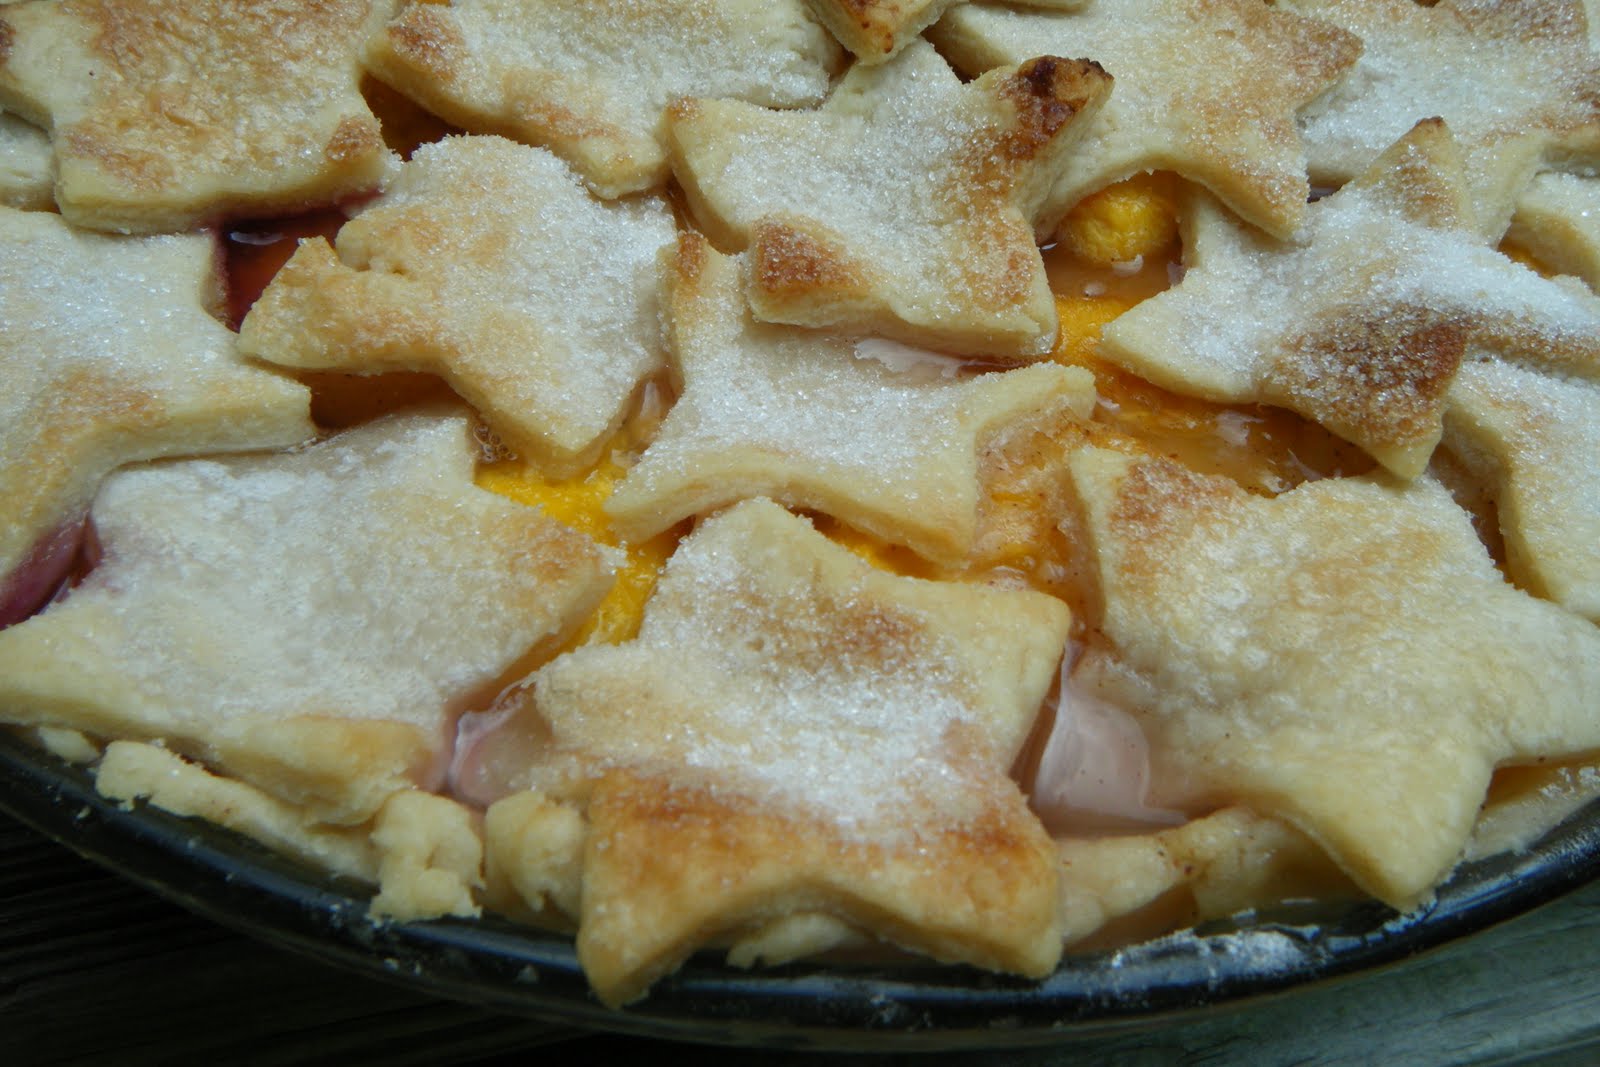
Use small star shaped cookie cutter to cut stars from the dough.


Cover pie with stars, overlapping slightly.


Pour a little half n half in a small dish. Get out your pastry brush.


Brush each and every star with half n half.


Put some sugar in a little dish. Grab some sugar in your fingers.


Sprinkle sugar all over top of pie. Don't be shy, but don't go crazy!


Aaah! Beautiful. The sugar will give the crust a wonderful sweet taste.


Place pie on a baking sheet to prevent spillage in your beautifully clean oven.


Wrap edges of pie with strips of foil so it doesn't burn.


Put pie in oven on 425 degrees. Bake for 35 - 40 minutes.
Remove foil from edges of pie 10 minutes prior to finished baking. This will allow the edges to brown nicely.


The finished product! Oh yes! So beautiful!


Allow to cool for at least a couple hours before cutting and serving.
You can leave your pie covered on the counter for 4 days.
Refrigerate if you like, but I prefer my pies to be left at room temperature.

A freshly baked, golden, sugary pie is so beautiful I can hardly stand it!!


Recipe: Peach Blueberry Pie

Pastry for 2 crust pie double-crust-pie-recipe from my blog.

3/4 C. white sugar
small handful brown sugar (approx. 1/8 C.)
3 Tbsp. flour
2 Tbsp. cornstarch
1/4 tsp. cinnamon
1 dash nutmeg
1/8 tsp. salt
3 C. peeled, sliced, fresh peaches
2 C. fresh blueberries

Make double pie dough recipe. Divide in half. Roll out one half into 10 inch circle. Line 9 inch pie pan with dough. Set aside. Combine white sugar, flour, cornstarch, cinnamon, nutmeg and salt in small bowl. Dump blueberries into the pastry lined pie pan. Sprinkle with half the sugar/flour mixture. Top with peaches. Sprinkle with remaining sugar flour mixture. Next, grab a small handful of brown sugar and sprinkle on top. Roll out second half of pie dough. Cut stars with small star shaped cookie cutter. Cover entire pie with stars, overlapping slightly, leaving tiny openings between stars to allow venting of steam. Brush stars with half n half. Sprinkle top of pie liberally with sugar. Place pie on baking sheet. Cover edges of pie with thin strips of foil to prevent burning. Bake 35-40 minutes at 425 degrees. Remove foil from edges approx. 10 minutes prior to finished baking time to allow edges to brown nicely. Allow pie to cool before slicing.

Enjoy!

August 1, 2010

Ham and Cabbage

Cabbage is in full swing at the farmer's market right now. I visited a local farm the other day and bought this huge head of cabbage


and these beautiful white potatoes with soft papery skins.


From the instant I heaved the cabbage into my cart, I knew exactly what I was going to make with it...one of my favorite meals from childhood...ham and cabbage.


My Mom's ham and cabbage is just about the best, homey, comfort food you can eat! The recipe is so darn simple I can hardly believe it! A couple years ago when I asked my Mom for the recipe, I wrote it down and said,
"ok...and.."
She said, "that's it."
Then I said, "come on, there HAS to be something else!"
to which she replied,"nope that's it".
I was skeptical, but followed my Mother's recipe to the "T". The urge for adding a little of this and maybe a little of that was strong, but I had to resist.

I'm so glad I did because it was just as I had remembered....so delicious, just the pure, natural flavors of earth's bounty...cabbage, potatoes, carrots, celery, ham and water all in one big pot! I did not even add a dash of salt or pepper! That will happen at the dinner table! There's always enough salty flavor from the ham, but a couple dashes of pepper atop the beautiful mound of carrots, potatoes and cabbage...oh my goodness...pure heaven.

As I write this now, ham and cabbage is boiling in a huge pot on my kitchen stove. The smell from the bubbling, burbling pot is filling the room and leaving me with a nostalgic and loving feeling for home. I am transported to a time when meals were cooked for me, laundry was done for me, and the only chores I had were setting the table, washing the supper dishes, and cutting the grass. Ah, life was easy.

And, so now, I cook ham and cabbage for my own family, hoping too that one day they will remember the ham and cabbage simmering in the kitchen of their childhood home. Maybe they will carry on the tradition of the pure, simple goodness of a home cooked meal. A meal cooked with love and locally grown vegetables.


Recipe for Ham and Cabbage:

1 small head of cabbage cut in half
8 white potatoes, leave the skins on cut into fourths
6 carrots, peeled, cut into rounds or chunks
3 stalks celery, chopped
3 1b. piece of ham

Throw all ingredients in a large pot. Fill water to just covering all contents. Bring to a boil. Cook on med. low heat for 1 hour or until all vegetables are soft and tender. Serve up in large soup bowls with salt and pepper on hand to season to your liking.

Enjoy!

July 31, 2010

zucchini and ricotta galette


I love it when zucchini is plentiful! There are SO many recipes you can make with zucchini!! The other day I found a recipe for Zucchini and Ricotta Galette. Oh my goodness! It was SO delicious! If you really want to impress the heck out of someone, make this recipe! The flavors of zucchini, garlic and ricotta are perfect together! The crust was absolutely fantastic! It was so light with lots of flaky layers. I have to admit...when I rolled out the dough for the crust, I was very nervous. It was very soft...so unlike traditional pie crust that I am used to. When I got to the part where you fold the edges of the crust up over the filling...the dough was not cooperating AT ALL! But....I made it happen and I just went with it! I am so glad I did. I just trusted that it would all turn out well in the end. And oh my did it ever turn out! Really, really impressed with the dough! The trouble that I had, and maybe you will have if you give it a whirl, is the dough got soft and meltey and sticky very fast...however, if you can get the dough up off the baking sheet and get it over the filling as best you can, it won't even matter! It will bake up beautifully, and look all rustic! Oh yes!! It was so worth it!


ZUCCHINI AND RICOTTA GALETTE

MAKE THE PASTRY DOUGH: WHISK TOGETHER 1 1/4 C. FLOUR AND 1/4 TSP. SALT. ADD 8 TBSP. OF COLD BUTTER, CUT INTO PIECES, TO THE FLOUR MIXTURE. CUT IN WITH PASTRY BLENDER UNTIL THE TEXTURE OF COURSE MEAL. IN SMALL BOWL, WHISK 1/4 C. SOUR CREAM AND 2 TSP. LEMON JUICE AND 1/4 C. ICE COLD WATER. ADD TO BUTTER FLOUR MIXTURE. MIX WITH BACK OF WOODEN SPOON TIL IT COMES TOGETHER. PAT INTO A BALL. STOP. DO NOT OVERWORK DOUGH. COVER WITH PLASTIC WRAP AND REFRIGERATE 1 HOUR.

WHILE DOUGH IS RESTING IN FRIDGE, SLICE 1 LARGE OR 2 SMALL ZUCCHINI INTO 1/4 IN. ROUNDS. LAY OUT ON PAPER TOWELS AND SPRINKLE WITH SALT. LET DRAIN ON PAPER TOWELS FOR 30 MINUTES. MEANWHILE, MINCE ONE MEDIUM CLOVE OF GARLIC, ADD 1 TBSP. PLUS 1 TSP. OLIVE OIL TO GARLIC IN SMALL BOWL AND WHISK. SET ASIDE. IN SEPARATE BOWL MIX 1/2 C. RICOTTA CHEESE, 1/2 C. GRATED PARMESAN CHEESE, 1/4 C. SHREDDED MOZZARELLA CHEESE, AND 1 TSP. OF THE GARLICKY OLIVE OIL AND SEASON WITH SALT AND PEPPER TO TASTE.

PREHEAT YOUR OVEN TO 400 DEGREES. ON FLOURED SURFACE, ROLL OUT CHILLED DOUGH TO 12 INCHES ROUND. TRANSFER TO UN GREASED BAKING SHEET. SPREAD RICOTTA MIXTURE EVENLY OVER BOTTOM OF GALETTE DOUGH, LEAVING 2 INCH BORDER. TIME FOR THE ZUCCHINI...ABSORB ALL LIQUID ON TOP OF ZUCCHINI ROUNDS WITH A PAPER TOWEL. OVERLAPPING ZUCCHINI ROUNDS, LAYER ZUCCHINI IN CONCENTRIC CIRCLES ALL THE WAY TO THE CENTER. TUCK EXTRA ZUCCHINI ROUNDS HERE AND THERE. DRIZZLE REMAINING GARLICKY OIL OVER ZUCCHINI. FOLD BORDER OVER FILLING, PLEATING THE EDGES TO MAKE IT FIT. THE CENTER OF THE GALETTE WILL BE OPEN. MAKE AN EGG WASH FOR THE EDGES OF THE CRUST BY BEATING ONE EGG YOLK WITH ONE TSP. OF WATER. THIS WILL CREATE A BEAUTIFUL GOLDEN COLORING ON THE CRUST. SPRINKLE TOP OF ZUCCHINI WITH SMALL HANDFUL SHREDDED PARMESAN. BAKE 30 - 40 MINUTES UNTIL FILLING IS PUFFED UP, ZUCCHINI IS SLIGHTLY WILTED AND PARMESAN IS GOLDEN. THE CRUST WILL BE A BEAUTIFUL GOLDEN BROWN. REMOVE FROM OVEN, COOL AND CUT INTO WEDGES.

ENJOY!

July 30, 2010

Knock Knock. Who's there? Carrot. Carrot who? Do you carrot all about me?


I was really pleased with my carrot crop this summer. It is so fun to pull a carrot out of the ground because each one is a different shape and size. It's like digging for treasure! You don't know what you're going to get until you pull it up. We grew more this year than last year, but I see that I am going to have to grow even more next year. After I trimmed, washed, peeled, sliced, and blanched the carrots, I saw that I had enough carrots for only 2 dinners. (four servings per dinner) After I blanched them and plunged them into ice water, I froze them in those reusable "Glad" containers that pre-packaged lunch meat comes in. Since I didn't grow enough this time around, I will pick up some carrots at the farmers market and freeze them as well. But next year.....look out baby! Carrot city! If that's the case, I really need to start canning!

Here is some very exclusive, newly released artwork, drawn by my children and me! Hope you enjoy it!

July 26, 2010

Spearmint / Mentha Spicata


My spearmint plant is flourishing! This is the first time I have ever grown spearmint and I am excited. I have it growing in it's own separate container due to the fact that it is very invasive. Mint is so aggressive it can actually spread from yard to yard if left to grow freely in the ground. If that is where you choose to grow it, just make sure you plant it in a deep bottomless container such as a 5 gallon bucket with the bottom cut out of it. I have learned that mint is a perennial, which means it will grow back year after year. Mint especially thrives in cool, moist spots but, it is so hardy it can tolerate full sun as well.

Before I go any further, I should note that spearmint and peppermint are two different plants. However, they are both a member of the botanical genus Mentha in the mint family. The leaves from a Spearmint plant possess a lighter, sweeter flavor, which can be chewed leaving a pleasant taste on the tongue. On the other hand, peppermint leaves are very strong and should be dried first and used sparingly.

I did a little research and found that, not surprisingly, the main use for spearmint oil is used for flavoring gum, toothpaste and candy. The #1 thing that comes to my mind is Wrigley's Spearmint Gum. Of course, mint is commonly used in cooking as well. The freshly chopped mint leaves, can be preserved in vinegar, and used as a condiment when served with lamb....maybe I should remember this when I have my lamb roast! Also, both dried and fresh mint leaves are used in soups, sauces and stews. Oh yes, and we mustn't forget the famous Mint Julep...the official drink of the Kentucky Derby. Spearmint leaves are also used found in the ever increasingly popular drink, the Mojito. And, oh my goodness, I just remembered....when I was a child, my Mom would give me "Tom Tucker Mint Gingerale" when I wasn't feeling well.

This summer, my favorite use for spearmint leaves has been in fresh brewed iced tea. After picking and rinsing the leaves, I crush and twist them to release the oils and drop them into the bottom of a nice tall glass. Of course, next comes plenty of ice and then finally the tea.


It all comes together to produce one heck of a refreshing drink on a hot summer day. It may seem silly, but that simple act of picking, crushing, and adorning my iced tea with a few mint leaves makes me one happy girl! I guess it's that whole "it's summer and the livin' is fine!" thing. Ya know what I mean? I think I am high off of summer this year, or maybe it's just the mint!
Ha Ha!!


I should also mention the medicinal uses for mint. Known for it's high amounts of pure essential oil menthol, mint eases pain and discomfort by relaxing muscles of the intestinal wall. This makes it a great remedy for indigestion, nausea and flatulence. I'm sorry, did I just say that? Yes, I did. But what do we all reach for when we are a little gassy or ate one too many slices of pepperoni, sausage pizza...spearmint or peppermint flavored TUMS my friend. It's the total cure-all for a wishy-washy, upset, gassy, bloatey, heart burny stomach. Actually, another great way to soothe an after dinner stomach is to make a tea with fresh or dried spearmint leaves. I have read that you can even heat it in a cup of milk for your little one's upset stomach. It's also used for alleviating congestion and soothing insect bites.

The great thing about mint is that it is safe to ingest or to apply topically. By topically, I mean that it is found in facial cleansers, cosmetics, shampoos, perfumes and ointments. It is also commonly used in aroma therapy, claiming to help your focus and concentration. It evens promises to clear your mind and mental stress helping you to sleep. I once had a pillow spray infused with menthol that actually did make me feel more relaxed and calm at bed time.

Now that I think about it, mint is prominent in my daily life...from brushing my teeth, washing my face and hair, chewing gum, providing me sinus relief, relieving my wishy-washy stomach after consuming a bowl of 5 alarm chili, and last, but not least, my wonderful, icy cold, refreshing, sweet, iced tea, with just a kiss of spearmint...what can I say...Mint...it's a wonderful thing!