Showing posts with label what about chickens. Show all posts

August 7, 2012

A very blueberry crisp, A very quilty quilt, and Some very crazy chickens


Man oh Man!! 
We've been blessed with some REALLY good blueberries in our CSA this summer.
Not to mention they are organic. Double bonus there! 
I made some blueberry pancakes a couple of times, and they were heavenly. 
These blueberries are not tart at all.
They are perfectly sweet.


I love blueberries. 
Yesterday, I made a very yummy, blueberry crisp. 
I was happy that the recipe used the remainder of my blueberry stash, as I didn't want them going to waste. 
The recipe for the awesome crisp will be at the end of this post.... so DO check it out.


I finally got myself going on my sailboat quilt again.
Yay!! 
I have really been putting the hours in on this thing.


I am hand quilting, so it does take some time. {but I machine pieced it together} 
Anyhow, I am proud of myself, because the quilt is starting to really come together. 
I am hoping to be done with all  hand quilting by tonight, 
and then I can start making the bias tape that goes around the edges. 
Call me crazy, but I love sewing on the binding. 
It is so fulfilling!! 
I attach the binding edge with my sewing machine... 
and then when you fold it over the edges and tuck in under, I hand stitch it to the back. 
For some reason...I love this part. 
I think because it is just stitch after stitch and it's almost mindless. 
It's just good.

For now, I will leave you with a couple photos of my crazy chickens. 
They look dead, don't they?!
Don't worry, I assure you...they are very much alive!


They are sunbathing on the hot wooden deck.
I have read that chickens don't like the heat and the sun...
so what's wrong with my silly chickens???


They have always done this....this is nothing new....this is a normal thing for my chickens.   
They apparently love the deck because the wood is so warm. 
Sometimes there's 3 or 4 of them all doing this together. 
In the rare occasion the chickens do this when we have a visitor, our guests will look out on the back deck and say "OH NO! I think something's wrong!!"  
I'm like, "oh, ya, they're fine, just get a little closer to the glass and they'll notice you and be up and running." 
My chickens don't do this all the time, but they do it a few times a week. 
Mostly, they do this in the cooler months when the sun is out and warming the wood...
but they do it once in a while in the summer too.
To me, chickens are a constant source of interest and entertainment.  
Too funny!!


A VERY BLUEBERRY CRISP

3 cups fresh blueberries
1/2 cup white granulated sugar
1 Tbsp. corn starch
2 tsp. lemon juice
1/3 cup packed brown sugar
1/2 tsp. cinnamon
1/3 cup flour
3/4 cup rolled oats
pinch of salt
4 Tbsp. softened butter

Toss blueberries with white sugar, corn starch and lemon juice
Dump into 8 or 9 inch baking dish.
Mix brown sugar, cinnamon, flour, oats, salt and butter with a pastry blender of fork.
Sprinkle mixture evenly over berries.
Bake in 375 degree oven for 35 to 40 minutes until golden.


March 2, 2012

Just a little of this and that


Yesterday I was busy putting away STUFF. There's just STUFF everywhere. Jackets, pencils, mail, coupons, quilting thread, tweezers, scrapbooks, notebooks, cookbooks, candles, baby toys, tennis shoes, snow boots, clothes, earrings, atlas maps, Boy Scout stuff, old homework papers, old report cards, video games.....STUFF.


I kinda feel like I want to clean like I'm moving to another house. When you prepare to move, you pack away all of the extra, unnecessary stuff . . . . and you're left with clutter-free furniture, counter tops and living space! I love it! I wonder if I'm getting that Spring cleaning feeling.


When I looked at my bookcase yesterday, the sun was shining through the window and highlighting the magazines and printed recipes tucked here and there . . . and I was perturbed. It looked so dusty and disheveled. Then, I put away all of the snow boots and extra shoes gathered by the front door and found a few dried leaves and lots of crumbly little pieces of dried mud and dirt that had been stuck in the thick treads . . . and I was like it. . . . errrrrrr!


Yep! I think I'm getting that itch for Spring cleaning. It will be nice to get that first warm day of the season when I can open a couple of windows and let some fresh air in!


Amidst cleaning, I did find time to take a little walk and enjoy that sunshine. I noticed white feathers peppered the landscape everywhere I walked. Chicken feathers. Not sure if they're from the Leghorn named Crystal Gale, or the Americauna named Sleepy. They were so pretty and fluffy, dancing softly in the breeze . . . glad I took a few photos because it is really raining out there this morning! No fluffy, puffy, pretty white feathers floating on a breeze today...everything is washing downstream today! Our creek is up sooooo high it will probably crest by afternoon. Our basement will undoubtedly flood {minimally} and that is quite normal for us...especially in Spring!


Boo!
This is Sleepy. 
She wants to know why I'm poking around in her business!

I realize she looks a little scary up close...but really, I love her the most! She is the only chicken that willingly lets us pick her up.

Today I will continue with a little cleaning. I've planned to use Mr. Clean Magic Eraser on the finger prints left at the edges of walls, openings and door frames. I'd also like to take a little time to do some quilting, drink some coffee and watch the rain from my living room window.

We are having dinner guests this evening . . .family . . .I'm making spaghetti with homemade meatballs and sauce, garlic bread and salad. Dessert is chocolate pudding pie with whipped cream! Yum! Well, I've got my day planned so I am off!


Aw, come on Sleepy! 
Don't go away mad.
Let's talk about this.
I need material for my blog!

Until next time! 

January 13, 2012

collecting eggs


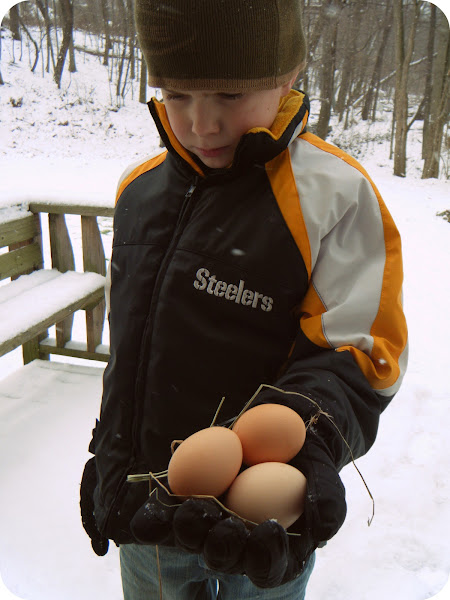
We love collecting eggs from our chicken coop. It is so rewarding!


I especially love the colors.
They are so beautiful.
Each egg is unique with it's speckling, spots, shapes and size.

For the most part, the eggs are completely normal. But...on occasion, we find an egg that is oblong and narrow. Sometimes we even find a very tiny egg that's about the size of a large marble. It's so interesting!


I thought I'd show you what's on the inside of these odd shaped eggs...I know you're curious!


Here is the inside of one of the normal shaped and sized eggs.


You are probably wondering if we eat the odd shaped eggs. Well, sometimes we do, but more than not, they tend to get left in the carton and passed over when we are cooking or baking. If I am going to use them, I usually break them open into a small bowl to check them first. If they look like normal, I just go ahead and use them.

I have to say that I have greatly enjoyed being a mamma to these chickens. They are the easiest animals to care for and they are always entertaining.


It's so interesting to watch the pecking order, and who is the bossy one. They fight over food. Once they get their piece of bread or melon (special treat), they take it in their beak and run away to eat by themselves. When we have younger chickens that are ready to be introduced to the flock, they get chased away from the food every time! It's quite sad, but it is what it is. It's the pecking order and it is completely natural. Of course I try to scold the older chickens when they do this...as if they are listening or care one little bit...cause they don't! hahaha!

May 20, 2011

Butchering Chickens

Well, we did it. We butchered our first meat chickens. There were 3 of them. They were given to us about 6 weeks ago from friends who could no longer keep chickens. The chicks were 2 weeks old when we got them and they were huge already. They are bred to be that way... grow fast, bulk up quick and ready to be butchered at 8 weeks old. They won't live much longer after that anyway, so if you feel bad about it, it may help to realize they don't live much past 10 weeks and are then susceptible to a heart attack because of their size.


It was a little nerve racking for my husband and I, for this was our very first time to process chickens. Process sounds a little better than butcher, and butcher sounds a little better than slaughter...what can I say. It was one of those things...it had to be done...it was time...and there was no turning back. We took the whole process very seriously, researched the process on the Internet and watched tutorial videos on YouTube prior to the big day.


We did everything as respectful and humanely as we thought we could. It is not as if we take pleasure in killing a chicken, but this is how our forefathers lived and we have a lot of respect for learning how to live without Mr. Grocery Store. It is definitely an interesting process and I have much respect for people who lived off the land...and there, of course, are still people who live off the land. There's something to be said for learning basic survival skills. I love it.


This photo makes me laugh because the little 8 week old egg layers came over for a look at the pot of steaming water over the fire. If they only knew what this pot of water was going to be used for, they wouldn't be hanging around. For some reason, this makes me think of Bugs Bunny and the episode where he is about to be made into "Hossenfeffer". I don't know how that is spelled. But does anyone remember that. The cook lures Bugs Bunny into the pot of hot water and Bugs doesn't realize he is about to be cooked. Do you remember "Bring me my Hossenfeffer!"

The photos I am about to show you are not meant to offend and be cruel. Also, I kept the more graphic photos away. Like, there are no photos of the chicken getting it's head cut off, so don't worry! I wanted to share with you the process of butchering a chicken. There is one part that was not photographed and that was the part where we gutted the chicken. Mostly the reason for this is our photographer which was our 13 year old neighbor took off with our boys to go ride bicycles. I was the one taking photos in the beginning, and then once I started to help with pulling the feathers, he took over.


In the photo above, the chicken is placed through a plastic milk jug. The bottom of the milk jug is cut off and the neck of the milk jugs is cut wider for the chicken's head to fit through. Putting the chicken into the plastic milk jug helps to keep his wings from flapping around like crazy after you cut the main artery in his neck to bleed him out. Also the handle on the milk jug is very helpful. You can have one hand on the handle of the jug and the other hand is holding the chickens legs just above the feet.


In the photo below, you can see my husband trying to feel for the pulse in the chicken's neck. This was a tip we found on the Internet. He never could feel it and had to go with gut instinct. As I mentioned, this was our very first time doing this and everything was a learning process.


I'm not going to show photos of the chicken hanging upside down and bleeding out...no...no...no...I'm not going to do that. So, I moved on to the next step. Once the chicken is pretty well bled out and completely dead, you dunk them in very hot water for about 8 seconds making sure to get all of their feathers wet. This process will insure that the feathers will come out very easily.


Here's me plucking feathers which, to my surprise, came out very easily. Notice the look on my face. That's pretty much how I looked from beginning to end of the whole experience.


Out of respect for the chicken, I blurred out his face and cut neck. I feel like this chicken is on an episode of "Cops". We hadn't cut off his head at this point, but we could have.


You can see behind me is a garbage can where we threw all of the feathers.


My husband hosed off the chicken after we felt we felt we got all of the feathers off.


In the photo below, we had started on our second chicken. This time I was the one holding the chicken in the milk jug instead of my son. I wanted to be part of the experience and I wanted to learn. However, I did not do any of the cutting. I could have if I wanted to. I kinda wanted to because like I said, I want to learn and have the experience of doing the whole process. I just couldn't bring myself to do it, so all of that was up to my husband.


Here you can see we threw the chickens in an ice bath in a cooler. There were completely plucked of all feathers and their head cut off.


By the time we got to the third chicken, we realized we should have cut the bottom half of the legs off before we put them in the ice bath. My reasoning for this was because of the dirt on the chickens feet. I just think it would be cleaner. So we pulled the other chickens out and cut the bottom of their legs off and then put them back in the cooler.

The only other thing we didn't do, which isn't a big deal is...we didn't singe off the tiny little hairs that are on the skin of the chicken. You can do this with an outdoor gas burner. You just quickly and briefly hold the chicken over the fire and singe off any tiny hairs. We decided that since we would be cooking our chickens on the grill, we didn't need to do this step.

At this point, the chickens had not been gutted. We decided this would be a good time for us to take a break, throw away the gloves, go in and wash our hands, and get something to drink.

We had no idea how well it would go with the gutting process, but it went just fine. There are no photos of this process, but that's ok, I have photos in my mind. It was a little gross and freaky pulling out the intestines and stomach and the heart and lungs and kidneys...etc. Basically you cut a slit in the anterior of the chicken at his bum big enough for you to put your hand in there. You have to be very careful to not cut into the intestines. If you do, it's not a bad thing, you just want to make sure you rinse the chicken very well. Anyhow, my husband did good and never cut the intestines.

As strange as it may seem...all you do is put your hand inside the chicken and start pulling everything out. It comes out fairly easily, but there is some suction working against you. Once everything comes out, and you look inside, it looks just like you would think....just like the chickens or turkeys you buy at the store that have already been cleaned for you. The very last thing to come out of the chickens were the lungs. My husband had me check each chicken to see if I could feel anything left. I did, but I could barely tell, I kinda had to dig my fingers down into the rib cage far up inside of the bird. There I found the lungs and kinda had to dig each one out with my fingers. I only knew this from watching the video I saw on YouTube. I am so glad we watched that video. It was very helpful.

In the photo below, you can see the finished product. What a beautiful bird! Once inside, at the kitchen sink, I rinsed the bird well and dabbed it dry with a towel. I then double bagged it in two one gallon freezer bags and placed them in the freezer.


I was very proud of us when it was all over. We researched how to do this and actually did it! It was a good feeling. I felt like an Ole' farm wife! Well, you've read my profile...I'm a wanna be farm girl! Now I'm one step closer!

April 12, 2011

Bathing Chickens


Chickens like to take "dust baths". Over the weekend, the weather was warm and beautiful. It was actually 80 degrees. Our hens decided it was time for a bath...in my herb box.


I haven't got around to cleaning up my herb box for the season yet, and the hens were more than happen to get in there and turn over the soil for me. My husband found them in there twice and chased them away both times.


I found them in there once myself...of course, I ran to get my camera before chasing them off.


They were probably thinking, "ok, what's up with this lady, first she takes a photo cause we're so cute..and then she chases us away."


After I chased the chickens away, I got out my little spade and fork and turned over the soil and added a fresh bag of potting soil.


Three of my herbs actually grew back from last year and are already sprouting leaves: tarragon, chives, oregano and thyme. I'll be adding basil, parsley, cilantro and dill...also another couple of thyme plants. I've noticed that I use thyme a lot and I ran out of thyme in November. Ugh. Can't let that happen again.

By the way, here is what my herb box looked like in all it's glory last summer. I even grew a little lettuce in there as well. It's just quicker and easier for me to pick it for lunch and dinner when it's right close to the house. I can't wait until it looks like this again.


P.S. Even after I made my herb box beautiful and ready for planting, on Monday afternoon, I found our white Americauna bathing. Well, she hates it when she's spotted bathing. I am not kidding. She hopped up so fast, squawed and bawked and jumped out of my herb box. Her feathers were covered in black soil. As she ran away shaking out the dirt and sqwaking at me, I told her "no, I am not going to apologize, your on my turf baby." Ahhhhhh, chickens are so funny!

December 26, 2010

chicken tracks...and other critter tracks as well!


I love the tracks in the snow made by my chickens. It really is the cutest thing ever.


The chickens do seem a little bored with the ground covered in snow.


It takes them a while to decide if they even want to come out of the coop at all.


Before the snow came, they would be at the door, sqwakin' and bawkin' trying to get out. I could barely get the door off the coop and they would be squirming their way through. But now...well, it's cold, and there's no worms, or mosquitoes, or green grass to munch on.


When I look out into the yard, I find them just standing there and staring. Normally they are on a never ending pecking session...all day long.


I am finding many other animal tracks in the snow near the chicken coop and in the field. I am no expert at identifying animal tracks in the snow, but I have made some educated guesses here. I believe these tracks belong to bunny rabbits. They hop and when they land, they have all four feet close together. Also, the rear tracks are longer than the front paws.


These tracks look like they belong to deer. We always have deer in our field. The tracks are large and solid like that of a hoof. Also, the positioning of the alternating foot prints and length of space in between the prints. I can't imagine it to be any other animal.


This track, I cannot identify. It may a squirrel. The snow is a little deeper here, so I'm thinking the tracks would not be very identifiable. The tracks are small and almost like little slits in the snow. What else could it be?


At first, I thought these were raccoon tracks, but at second glance, I really thought them to be squirrel tracks. They are all around the coop and I know the squirrels like to pilfer the chicken feed. But, looking again, I think they are much too big for a squirrel. My husband said they belong to a ground hog. We definately have groung hogs around here!


Finally, these last tracks, they are either a red fox, which we know for sure frequents our neighborhood and has been spotted in our field. Notice how there are 2 paw prints very close to each other for each imprint..almost overlapping. It makes me wonder if a fox was pouncing along, pushing off with the two hind feet close together and then landing on two front paws close together. But then again, they look small enough to be a kitty cat...maybe she was running...I don't know. I am perplexed. What do you think? I love these tracks..I am so curious!