Showing posts with label what about pie. Show all posts

August 20, 2012

Peach Butterscotch Pecan Pie...oh ya baby!


Oh baby! 
This is the mother of all peach pies!
I am really loving how it turned out!!
Sooooo delicious! 

So the basic ingredients....
beautiful juicy peaches!


freshly chopped pecans!


smooth and creamy butterscotch!!!
Major yum!


I tried something different with the top crust. 
This is the first time I tried this design....
and I like it!!
I always brush my top pie crusts with half n half cream 
and sprinkle generously with sugar.


Goodness....it's a thing of beauty.
And, it tastes fantastic!! My husband had 2 slices.
That is always a good sign!

****
PEACH  BUTTERSCOTCH  PECAN  PIE

4 cups sliced peaches {peeled and pitted}
1/2 cup brown sugar
1 cup chopped pecans
2 Tbsp. flour
1/8 tsp. salt
1/4 cup butter
2 tsp. lemon juice
pastry for 2 crust, 9 inch pie

Dump sliced peaches in pastry line pie pan. Sprinkle chopped pecans on top of peaches. In a saucepan, mix brown sugar, flour, salt and butter. This will be your butterscotch filling. Heat until well incorporated and the consistency of thick syrup. Remove from heat and stir in lemon juice. Pour this butterscotch mixture over top of the peaches and pecans. Top your pie with the second pastry. Make sure to cut slits to allow steam to escape. You can do the above design I chose by cutting slits into the dough before you put in atop your pie.
Brush your top pie crust with milk or half and half and sprinkle with sugar.
Cover edges of pie crust with foil to protect from burning. Remove foil 10 minutes before done.
 Bake in 425 degree oven for 30 to 35 minutes. 
Bake pie on a cookie tray pan to prevent spillage in oven.

February 1, 2012

Lucky Leaf Pie Fillings and Giveaway!


Have you tried Lucky Leaf pie fillings?
They are absolutely delicious and so easy to work with!

I was recently contacted by a representative for Lucky Leaf, and was asked if I might be interested in baking with their premium pie fillings.


I was very excited about about this, as I know Lucky Leaf has a great reputation and has been in business for many years! I was able to choose the pie fillings I wanted to bake with, and I chose strawberry as well as apple.

Later in my post, read about my Lucky Leaf giveaway!

By the way, Lucky Leaf has fantastic recipes on their Facebook page. Here is the link.
Facebook Lucky Leaf pie filling recipe/videos  The recipes look fantastic and I plan on trying each of them.

Inspired to create my own recipes, I decided to make apple hand pies.
They turned out fantastic! Soooo delicious! The cinnamon and apple, combined with the flaky and sugary pie crust was perfect together! It made me think of those golden, sunny days of autumn!

{One 21 ounce can made 12 apple hand pies}

I made the pie crust from scratch, but you can also use unbaked, ready-made pie crust dough from the grocery store. Click here  for my double-crust, pie dough recipe.

First I rolled the dough and cut a 5 inch circle with a paring knife using a cereal bowl as a guide.
Place 3 or 4 pieces of apple slices from the pie filling into the middle of the circle.


Wet the edge of half of the circle with water.
Fold the circle in half over the pie filling.
Crimp together dough at edge with a fork to seal hand pie.


Next, brush hand pie with egg white wash...{one egg white beat with 1 Tbsp. water}
Sprinkle white sugar generously on top of hand pie.
Cut 3 small slits in top of hand pie to allow steam to escape while baking.

Place hand pies on a parchment lined baking sheet. Bake in 400 degree oven for approximately 20 minutes. Hand pies will be light golden brown when done.


Allow to cool and enjoy!
***

The next recipe I created was Chocolate Bottom Mini Strawberry Pies.
These were so fun to make and tasted like heaven!
It brought back memories of the strawberry festivals my mom took me to as a child!

Just look at that!
That is a tiny work of art!
A work of art that I want to eat...right now!

{one 21 ounce can made 8 mini pies}

First, make a double pie crust recipe..click here for recipe...or you can buy ready-made pie crust dough in the grocery store. Roll out pie crust dough and cut 8, five-inch circles with a paring knife using a bowl for a guide.  These will be used for the bottom crust.  Next, cut out 8, three-inch circles. Use a drinking glass for a guide. Cut a small hole or a small heart in center of each of these circles. These will be the top crust of your mini pies. Set aside.

Ease one 5 inch circle of dough into each cup of a muffin pan. Sprinkle semi-sweet chocolate chips to cover the bottom of each dough-filled cup.


Fill with Lucky Leaf Premium strawberry pie filling, mounding slightly.


Next, wet the edges of the 3 inch circles of dough, and place {wet side down} on top of each strawberry filled cup. Press top crust and bottom crust together gently at edges, and either crimp edges with fork or flute edges with your finger tips to seal.

Brush top of mini pies with egg white wash. {one egg white beaten with 1 Tbsp. water}
Sprinkle generously with white sugar.


Bake in 400 degree oven for approximate 20-23 minutes.
Pies will be golden when done.


I am so pleased with how these turned out, and how delicious the pie filling was!


I think I am in love!
Well, I know I am in love!
I will definitely use Lucky Leaf pie filling again.
I was very impressed with the taste of both the apple and the strawberry filling.
Trust me, I am a "from scratch" kind of girl...so for me to say that, you know it's worthy!
I was also very impressed with the minimal amount of ingredients in the pie filling...no high fructose corn syrup and no long list of chemicals and preservatives that I can't pronounce.
Very impressive!


And now for the giveaway!


Lucky Leaf has graciously offered to give one of my readers a fantastic giveaway! 

This giveaway includes: 
one can Lucky Leaf Premium Apple pie filling, one can Lucky Leaf Premium Cherry pie filling, Apple Crisp mix, recipe booklet and a pot holder!! To enter this fabulous giveaway, please leave a comment below! That's all you have to do! I will pick one random reader on Monday, February 6th, and announce the winner here, on my blog! 

Thank you Lucky Leaf!

*P.S. My blog is printer friendly now. Look for the print button at the end of each post. It will bring you to a window where you have the option to eliminate the images so you can print and not have to use up all your ink. Also it gives you text size option. You can also highlight content that you don't want printed by putting your cursor on the sentence. You will be asked if you want that particular part deleted so you don't have to print the whole post. You will be able to just print out the recipe, or whatever it is, specifically that you want printed. Awesome! :)

August 25, 2011

Tomato Sausage Pie


Hello all!

If any of you are overflowing with tomatoes from your garden or your neighbors keep giving you more and more tomatoes...this is an awesome recipe! I ate the entire pie myself over a period of 4 days. I had it for dinner the first night...fell in love...and then had 2 slices for lunch every day until it was gone! No one else in my house is into tomatoes, so it was my pleasure to eat the entire thing! Man that really makes me sound like a hog..that's a little embarrassing! LOL! Well, it's not like I ate the entire thing in one sitting! Ha Ha!

INGREDIENTS:
1 - 9 inch uncooked pie shell, 1/2 pound sausage, 1 c. chopped onion, 2 cloves minced garlic, 1 egg, 2 Tbsp. Dijon mustard, 1/2 c. light cream, 2 c. shredded mozzarella, about 3 tomatoes sliced.

DIRECTIONS:
Cook sausage in fry pan in small amount of olive oil. Chunk sausage into pieces. Add onion and garlic. Careful to not burn garlic.

In a small bowl, mix together 2 Tbsp. Dijon mustard, 1 egg and 1/2 cup light cream. {I used half n half.} Stir into cooled sausage mixture.

Sprinkle 1 cup shredded mozzarella in bottom of uncooked pie pastry shell. Pour sausage and egg mixture on top of mozzarella.

Make a layer of sliced tomatoes covering the entire top of sausage/egg mixture. Sprinkle with 1 cup shredded mozzarella cheese. Sprinkle top of pie with a bit of dried basil and oregano.

Bake 35 to 40 minutes in 375 degree oven. Let stand 20 minutes before slicing.


Enjoy!

June 1, 2011

Blue Ribbon Pie Contest


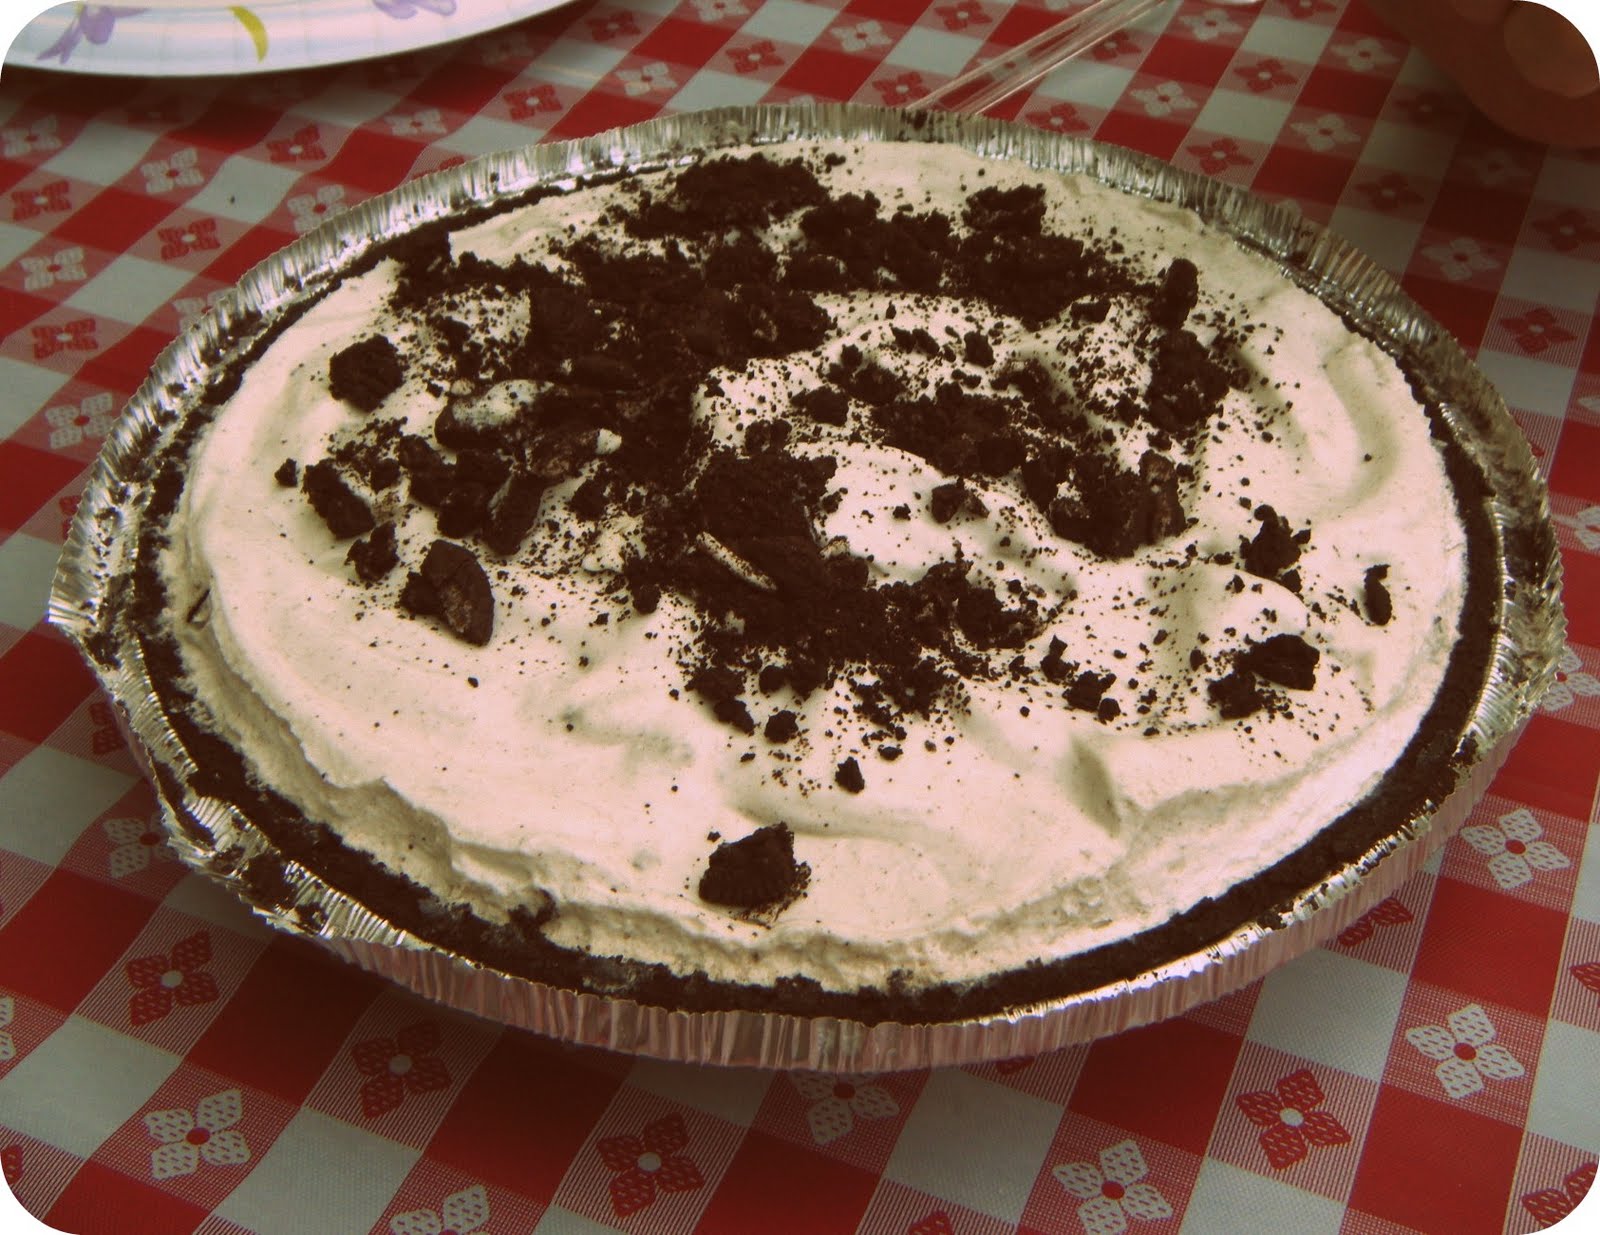
We held our 3rd annual Memorial Day picnic at our house this past weekend. I decided to include a Blue Ribbon Pie contest at the picnic as well. I have been wanting to do this for years and finally got the notion to just go for it. We had a turn out of 5 pies which included mine. Here's a list of the pies in the contest.

Oreo Creme


Caramel Apple


Double Bottom Blueberry Lemon and Pecan


Strawberry Rhubarb


Banana Creme


I picked 5 random judges....lucky them!!


We numbered the pies 1 through 5, and each judge was given a small sampling of each delicious pie...one at a time...to taste, savour, and judge. When the tasting was done, each judge cast a secret ballot. The ballots were read as they came out of the bag.....and so a winner was declared!

How can I humbly say it...but, I actually won the Blue Ribbon with my caramel apple pie.


It was funny because, it was my house, my contest, I handmade the ribbon, and then...I won first place. As I put on the ribbon I jokingly said, "I feel like I fixed this thing." But really, it was fair. It was up to the judges, and they could have voted any way they wanted to.

After the contest was over, the pies were open to everyone to taste. I think pretty much everyone who tasted them had a sampling of each...I know I did!

Each pie was so good...they all deserved a ribbon! I mean, it's pie...how can you go wrong!

I am so glad we had the contest! It all played out very well. There seemed to be a lot of interest and a lot of laughs. I definitely plan to do this again next year. I hope that this year's contest has generated a lot of interest for next year, and that we will see new contestants next time!

Click here for all of the recipes for each of these wonderfully delicious pies!
http://whataboutpie.blogspot.com/p/2011-pie-contest-recipes.html

December 30, 2010

Kumquat Pie...a puffy, fluffy, orangey cloud


Do you know what a Kumquat is?
It's a small oval shaped fruit, the size of a large olive, that resembles an orange...a teeny, tiny orange! It has a thin, sweet skin with tart flesh...very tart flesh!

The kumquat is believed to be native to China. The fruit is grown in China, Japan, Florida and California. They grow on shrub-like bushes that resemble tiny orange tree. Kumquats are frequently candied or made into preserves and jelly.


I had my first experience eating a Kumquat just the other day.
It was......TART! Yowza! This little thing has some serious pucker power! I had no idea what to expect though, so I just went for it. It tastes like an orange, but sour like a lemon...and you can definitely taste the rind.


Some like to cut them in half...


and dip them in sugar.


This method was much more palatable!


So the interesting thing about Kumquats is you can eat the entire thing..except for the seeds. This alone intrigued the heck out of me. It just seemed so odd to eat a teeny, tiny "orange", rind and all. How could that be possible...let alone, taste good?

My curiosity had the best of me. I bought the package of Kumquats without knowing what I would make with them, but figured I would be doing some investigating very soon. Low and behold, there was a recipe for pie on the inside of the container. If this was the recipe the growers decided should be on their packaging...how could I go wrong? I went for it!

Getting down to business, I washed the kumquats and pulled off the tiny green stems.


Silly me...I forgot to slice the Kumquats open to de-seed them before I threw them into the food processor to be pureed.


As I began to pulse them and chop them into oblivion, I screamed "AAAHHHH! THE SEEDS!"


Dude, how could I have forgotten! So...I began pulling handfuls of pulp out of the food processor bowl and picked out all of the seeds. Luckily 98% of the seeds were still intact and were very easy to spot and discard. A few had been cut through, but even still, they were easy to pick out. Don't ya hate when you make a stupid mistake and then correcting it takes double the time to fix?! However, despite this small mishap, this pie is sooooo easy to make!

I followed the recipe to the "T"...I wasn't about to make any changes with an ingredient I knew nothing about. I figured I'd make it this way, try it, then make adjustments or enhancements next time if I felt so inclined.


By the way, there is no baking required...this is a refrigerator pie! Easy, Easy!

I love this photo! It's whipped topping and sweetened condensed milk. It's so beautiful! I could just get a spoon and eat it and be happy!


The first step is to cream the whipped topping and sweetened condensed milk together.


Next, add the kumquat puree.


blend that together...


Scoop the beautiful, fluffy goodness into a pre-baked pie shell, and chill in the refrigerator for at least 4 hours.


After a night in the fridge, the pie was perfectly chilled and I was ready to taste the first slice...and I was pleasantly surprised!


So light and airy! So very, very creamy! The orange flavor was full bodied but well rounded out by the sweetened condensed milk.

I really like this pie!


I would put this pie in the same family as lemon meringue and key lime pie. In fact this would be like Key Lime's cousin...lemon meringue's baby sister!

When you want a fresh and light dessert to cleanse the palate after a seafood dinner or pork roast meal...Kumquat pie would make a wonderful choice!

I think this was a great recipe...but the amatuer pastry chef deep inside of me is wanting to put her own twist on this pie...something like a thin layer of chocolate at the bottom of the pie! Something like a touch of pretty chocolate shavings to garnish the top of the pie! Sounds good! We'll see!

But until then, I think I'm going to go enjoy another slice of this pie with a cup of tea and think about the new year to come.

Happy New Year Bloggy friends! Here's to 2011...may it be a good one!


*for pie crust, use this recipe

PASTRY FOR LEMON PIES

1 1/2 cups flour
1 1/2 tsp. sugar
1/2 tsp. salt
1/2 cup vegetable shortening
1 Tbsp. lemon juice
2 Tbsp. cold water

Mix flour, sugar and salt. Remove 2 Tbsp. shortening from the 1/2 cup and set aside. Cut in the remaining shortening with two knives or a pastry blender into the flour mixture until mixture resembles course meal. Cut in remaining 2 Tbsp. shortening in pieces the size of large peas. Add lemon juice and mix with fork. Add cold water one Tbsp. at a time and mix with fork. Form into a ball. Roll out on lightly floured surface. Fit loosely into pie pan, pat out air bubbles and flute edges. Prick sides and bottom of crust with a fork. Bake in oven 450 degrees for 10 to 12 minutes. Cool. Makes one 9 inch pie shell.

September 26, 2010

Caramel Apple Pie, oh my!


Ok, so I think I made my best pie ever! The other day, I made a caramel apple pie and it was so delicious I scraped the plate...and so did my husband...and my oldest son actually pretended to pass out and fall on the floor. It was so funny! I take that as a serious compliment!

I got this huge bag of green apples at Wal Mart...


...they were sold in these cute, little, heavy, plastic tote bags with handles. Maybe you've seen them at your local Wal Mart? I also bought a container of Marzetti's caramel dip. After a few days, we ate a couple apples and a little bit of dip....and I knew it was time.....time to make the CARAMEL APPLE PIE with what was leftover!


I made a caramel apple pie last Fall and fell in love with it! Well, since then, I have made many a pie and my pie making skills have increased ten fold! So, this time around, it was even better.


Here's my recipe!!

CARAMEL APPLE PIE

3/4 C. sugar
3 Tbsp. flour
1/2 tsp. cinnamon
1/8 tsp. nutmeg
1/4 tsp. salt
6 to 7 C. sliced, peeled, tart apples
3/4 C. Marzetti's caramel apple dip
pastry for a double crust pie click here for my recipe

Mix sugar, flour, cinnamon, nutmeg and salt. Combine apples with cinnamon mixture and toss to coat.


Heap apples into 9 inch pastry lined pie plate.


Spread caramel on top of apples.


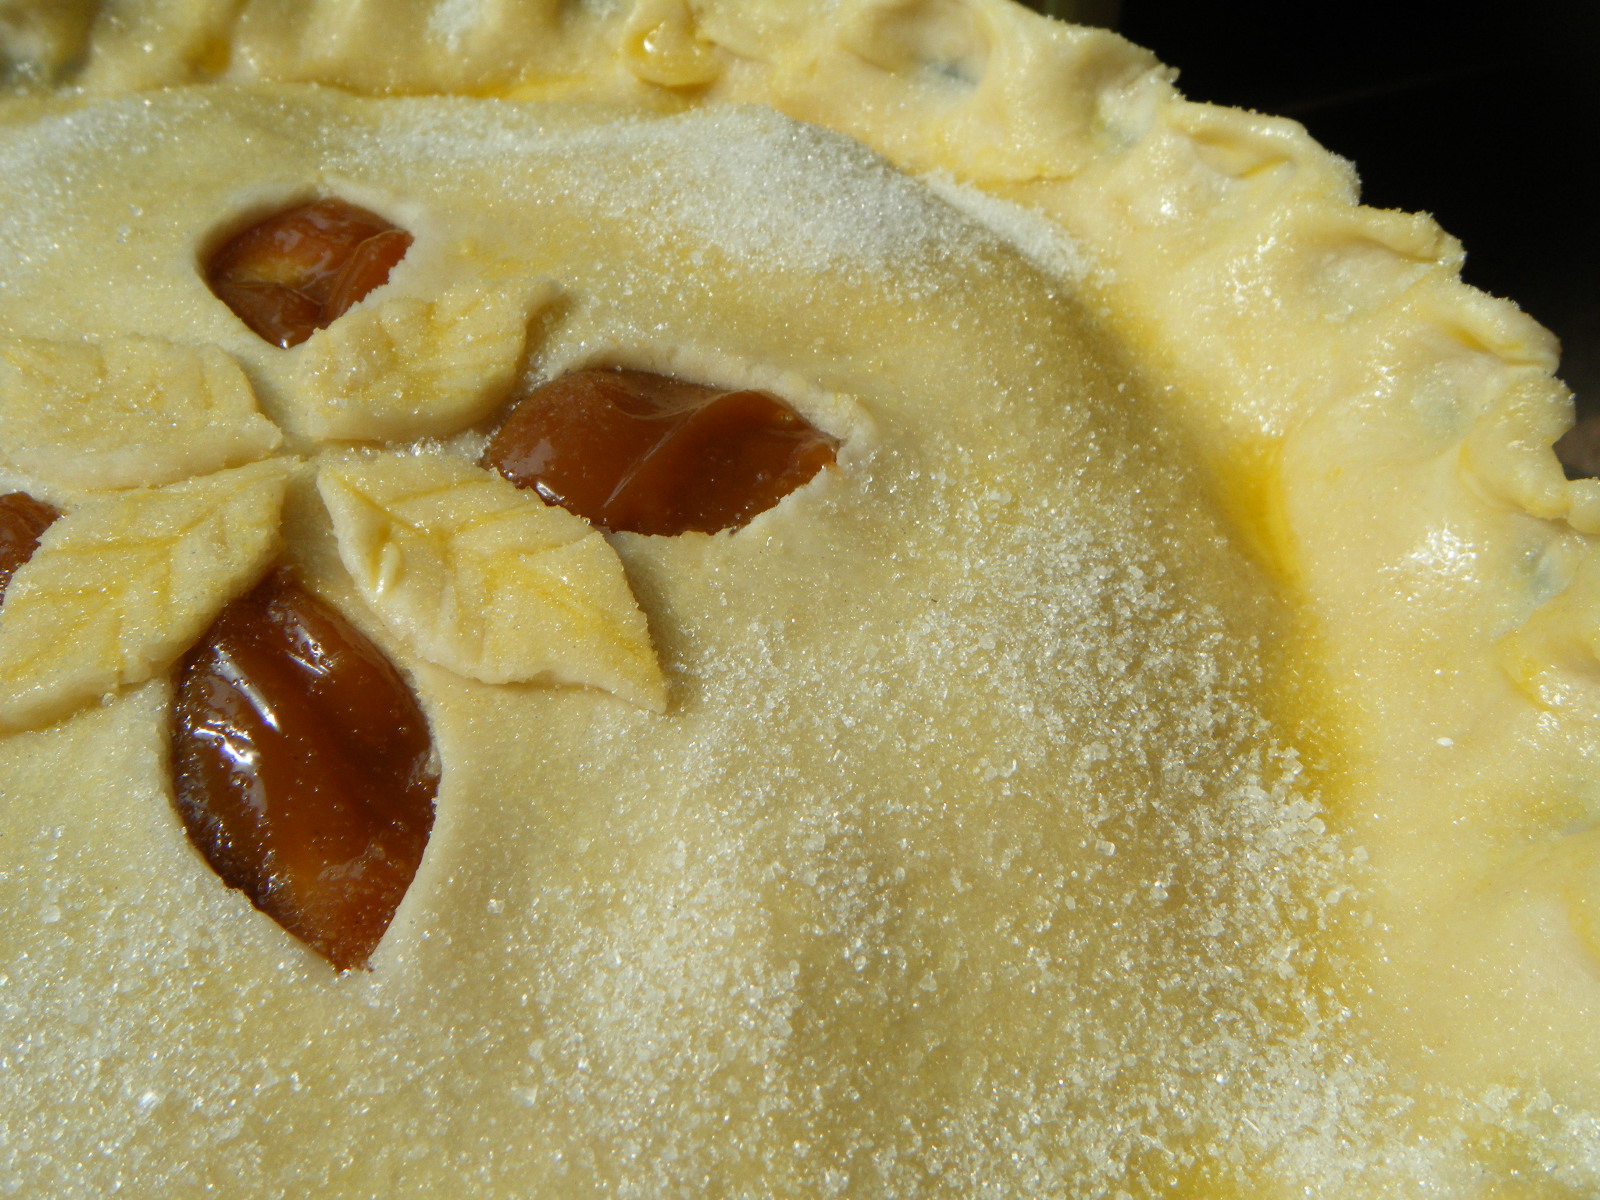
Cut 4 slits, or cut 4 pretty ovals into top pie crust, place on top of apples and crimp edges to seal pie. If you want, you can make cute little leaves with the oval cut outs by using a knife to make leaf design. Affix leaves to top of pie crust with egg wash (1 egg yolk mixed with a splash of water). Brush egg wash all over top of pie and sprinkle top of pie generously with sugar.


Cover edges of pie with strips of foil to prevent browning.


Bake pie at 425 degrees on a cookie sheet for 50 minutes.


Ten minutes before pie is done, remove foil from edges of pie so they can brown. At this time check the top of your pie for browning...if your leaves or any part of your pie is browned enough to your liking, just place a little piece of foil over it until finished baking.


Cool thoroughly before cutting and serving.


Enjoy!