

June 6, 2011

June 3, 2011
Reclaiming my childhood summer

It's June 3rd.
It's June 3rd!
Wait...it's June! It's summer!!
Now...of course...according to the calendar...summer doesn't officially start until June 21, at 1:16 PM....but that's beside the point. By the way, what that means is:

The first day of summer: the summer solstice—is the longest day of the year, the Sun reaches its most northern point in the sky at local noon. After this date, the days start getting shorter. {*copied this from Farmers Almanac website}
So, this "it's summer" thought popped into my head this morning as I was getting fresh feed and water for my chickens. I told myself to "think summer" from now on and to try to put myself in that childlike mindset of what summer is, what summer means and really enjoy it!

The first thing that came to my mind was how I would have already been out of school by now {if I was a kid} and I would be waking up with a smile on my face knowing that the day was mine!
The day was mine to play, swim, lay in the grass, climb trees, ride bikes and skateboards, swing and climb all over the swingset like a monkey, roam the woods behind the house...basically to spend the ENTIRE day outside.
I found myself longing for those days. To just have one day like that as an adult...it would be so good!

Even if I tried to have a day like that...which... actually...I could come pretty close...as an adult...there are things you just can't escape.
I have to feed my kids and hubby, the bills and the mounding laundry will inevitably sneak their way back into my mind...people will stop by, and I will have to entertain, or at least be cordial.

The dishes will pile up and I will look at the Kool Aid spills on the kitchen floor until they dry and our bare feet are sticking to the floor..ugh, I hate that feeling. I am no neat freak by any means...I want to be a neat freak...I am a neat freak wanna-be....but it is just not in me...but anyhow, the mounting mess would still get to me because I will think about how much I have to do later. And for some reason, that overwhelms me.
So...I'm wondering...is it possible to have a carefree summer day?

I mean...a for real...really, really...for real...childlike, carefree, no responsibilities...carefree day. I think if I plan ahead, it just might be possible. How funny is that. There has to be planning to do something that's carefree!
Ha Ha Ha!!! LOL!

I have to plan everything out ahead of time so I can try to have one "childlike" summer day. I would have to make dinner the day before...something easy that everyone can just grab when they get hungry.

My kids are 9 and 12 so that should be no problem. We can use all disposable plates and silverware. I can get all the dishes and laundry done...or done enough...the day before. I don't have to answer the phone...I can screen the calls...wait...screening calls is still acting responsibly. Darn!
But, one thing I can't change..I don't think I can convince my kids to not fight or get into any disagreements on what's fair and not fair

I don't think I can convince them to not come running to me to solve the problem of how someone stayed too long on base during tag, or how someone never goes to get the ball when it goes too far, or how someone counts too fast during hide and go seek or he hit me for no reason, or he's hogging the tree house swing! Dear Lord...please help me on this one! So if I can get them to solve their own problems for one day...and believe me, I try to get them to do this anyway...I just might be able to pull this off.

Even if this completely carefree day never comes for me this summer...
I vow..{repeat after me}
I vow...
to take time...
this summer...
to do anything and nothing...
to consciously make the effort...
to have a child's mindset...
to lay in the grass...
look up at the clouds...
read a book in the shade...
drink some Kool Aid...
go swimming at least once a month...
ride a bike...
catch lightning bugs...
eat popsicles...
and take a walk in the woods.
It's summer!
Slow down and enjoy this beautiful earth
and the time you have been blessed to be able to appreciate it!
June 1, 2011
Blue Ribbon Pie Contest

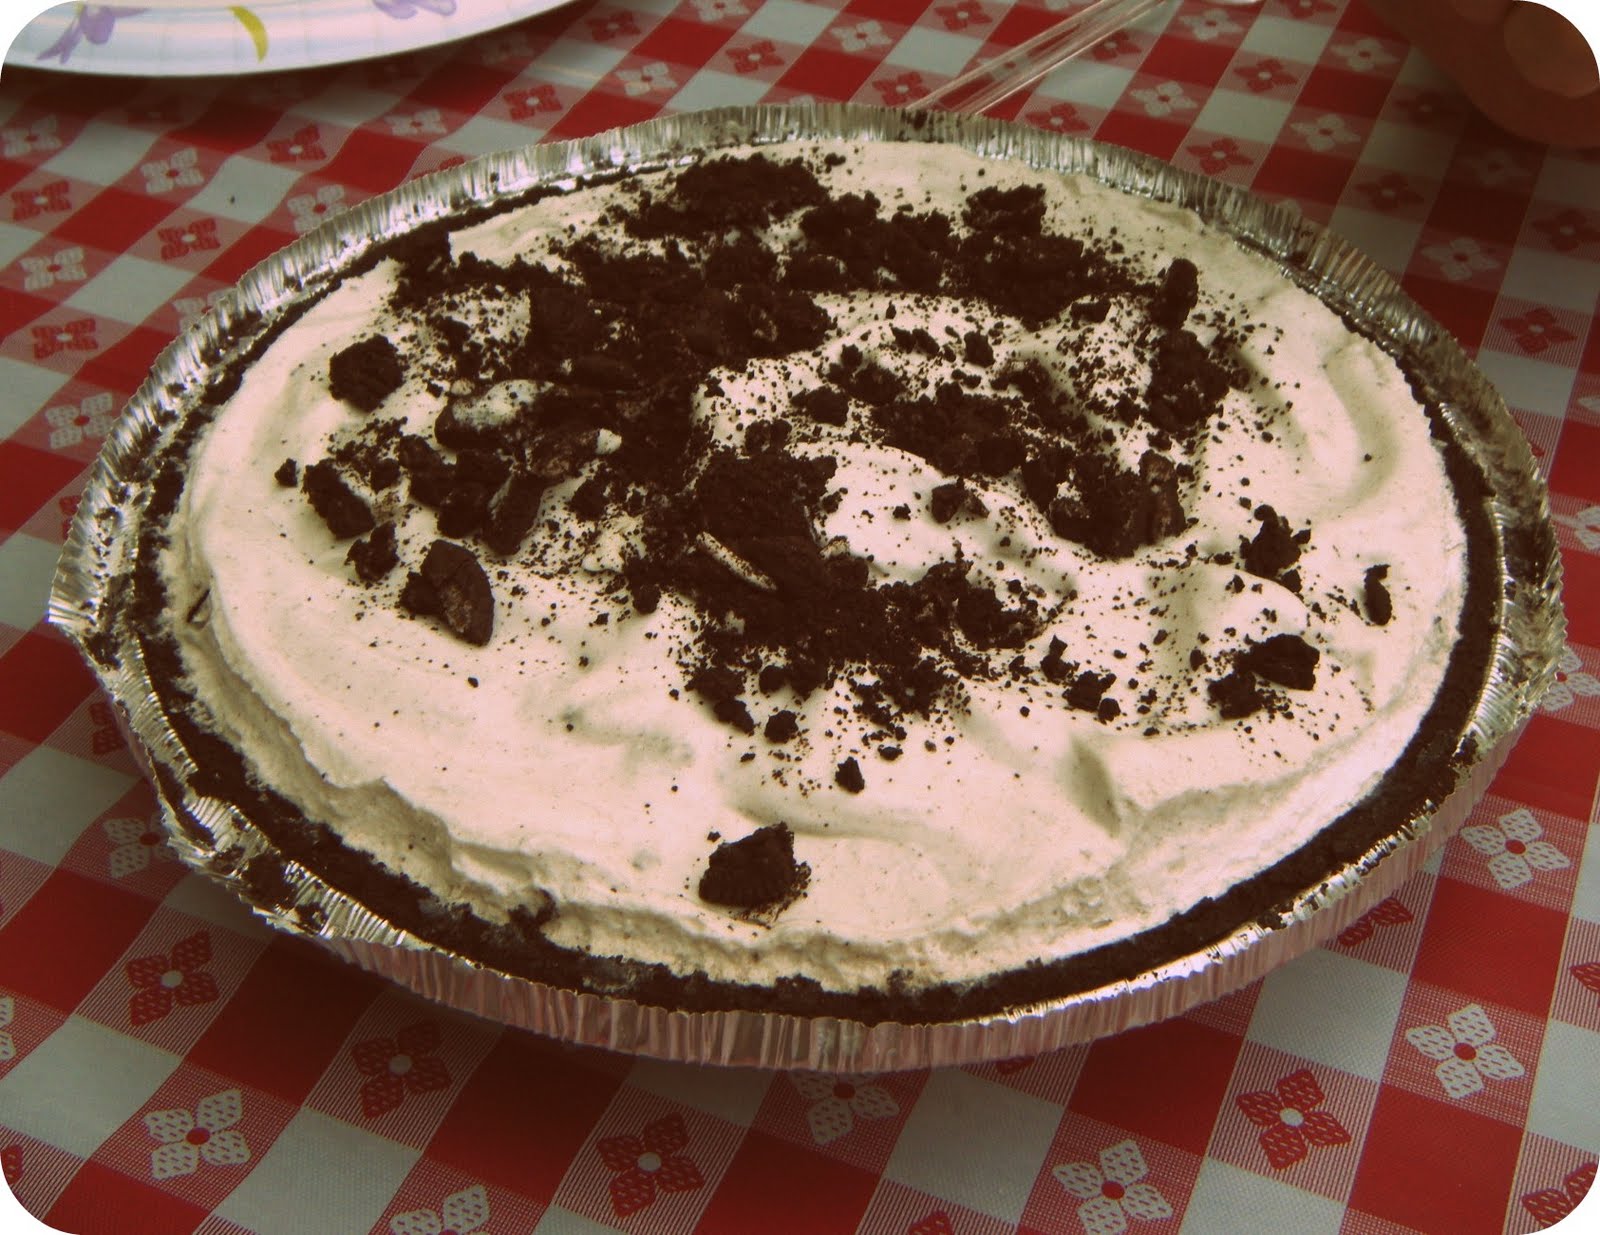
We held our 3rd annual Memorial Day picnic at our house this past weekend. I decided to include a Blue Ribbon Pie contest at the picnic as well. I have been wanting to do this for years and finally got the notion to just go for it. We had a turn out of 5 pies which included mine. Here's a list of the pies in the contest.
Oreo Creme
Caramel Apple

Double Bottom Blueberry Lemon and Pecan

Strawberry Rhubarb

Banana Creme

I picked 5 random judges....lucky them!!

We numbered the pies 1 through 5, and each judge was given a small sampling of each delicious pie...one at a time...to taste, savour, and judge. When the tasting was done, each judge cast a secret ballot. The ballots were read as they came out of the bag.....and so a winner was declared!
How can I humbly say it...but, I actually won the Blue Ribbon with my caramel apple pie.

It was funny because, it was my house, my contest, I handmade the ribbon, and then...I won first place. As I put on the ribbon I jokingly said, "I feel like I fixed this thing." But really, it was fair. It was up to the judges, and they could have voted any way they wanted to.
After the contest was over, the pies were open to everyone to taste. I think pretty much everyone who tasted them had a sampling of each...I know I did!
Each pie was so good...they all deserved a ribbon! I mean, it's pie...how can you go wrong!
I am so glad we had the contest! It all played out very well. There seemed to be a lot of interest and a lot of laughs. I definitely plan to do this again next year. I hope that this year's contest has generated a lot of interest for next year, and that we will see new contestants next time!
Click here for all of the recipes for each of these wonderfully delicious pies!
http://whataboutpie.blogspot.com/p/2011-pie-contest-recipes.html
May 25, 2011
How to make patriotic garland

It's so fun to decorate for the holidays...
but I don't love to spend the money!
What I do love is creating decorations using materials I already have on hand! Since I'm a scrapbooker from way back when, I have plenty of red and blue paper scrapbook paper on hand.
Here's a tutorial on how to make a patriotic garland perfect for Memorial Day and the 4th of July. I used standard 12 inch by 12 inch scrapbook paper...various patterns of reds and blue. For the white paper, I had to be a little more creative and used plain white printer paper. I created simple designs with red and blue crayons.
Materials needed: decorative paper, scissors, clear tape, stapler and string
but I don't love to spend the money!
What I do love is creating decorations using materials I already have on hand! Since I'm a scrapbooker from way back when, I have plenty of red and blue paper scrapbook paper on hand.
Here's a tutorial on how to make a patriotic garland perfect for Memorial Day and the 4th of July. I used standard 12 inch by 12 inch scrapbook paper...various patterns of reds and blue. For the white paper, I had to be a little more creative and used plain white printer paper. I created simple designs with red and blue crayons.
Materials needed: decorative paper, scissors, clear tape, stapler and string

After cutting 12 x 12 paper in half, I cut about 1 inch off the top of each half leaving 2 pieces of paper approx. the size of 11 x 6. You can make 2 stars from this.


Position patterned side of paper facing toward your right hand when cutting angle 1 inch down from top, cutting up to the top left corner. Depending which way you have the folds facing when you cut will determine the shape of the star. You can do it either way. But be consistent with all the stars. After you cut one end, turn the other end upright and do the same thing.


This gummy blue stuff that you use to hang posters on a wall works perfect for surfaces like brick. Make sure you remove any dust on the surface or the gummy blue stuff won't stick.

I am so delighted how this turned out!! It is perfect for my Memorial Day picnic and Blue Ribbon pie competition I am hosting at my house this Saturday. It just adds that finishing touch to my mantel.
Out takes:

As I was hanging up the garland on the mantel, one of our hens flew up and perched on the window sill outside. It scared me half to death because there's not much room for her to perch and she was flapping her wings and scratching and trying to clutch the window sill. It was pretty comical. She finally got a good hold and stayed there for a while. I swear...my chickens are the NOSIEST things ever! They make me laugh!
May 20, 2011
Butchering Chickens
Well, we did it. We butchered our first meat chickens. There were 3 of them. They were given to us about 6 weeks ago from friends who could no longer keep chickens. The chicks were 2 weeks old when we got them and they were huge already. They are bred to be that way... grow fast, bulk up quick and ready to be butchered at 8 weeks old. They won't live much longer after that anyway, so if you feel bad about it, it may help to realize they don't live much past 10 weeks and are then susceptible to a heart attack because of their size.

It was a little nerve racking for my husband and I, for this was our very first time to process chickens. Process sounds a little better than butcher, and butcher sounds a little better than slaughter...what can I say. It was one of those things...it had to be done...it was time...and there was no turning back. We took the whole process very seriously, researched the process on the Internet and watched tutorial videos on YouTube prior to the big day.

We did everything as respectful and humanely as we thought we could. It is not as if we take pleasure in killing a chicken, but this is how our forefathers lived and we have a lot of respect for learning how to live without Mr. Grocery Store. It is definitely an interesting process and I have much respect for people who lived off the land...and there, of course, are still people who live off the land. There's something to be said for learning basic survival skills. I love it.

This photo makes me laugh because the little 8 week old egg layers came over for a look at the pot of steaming water over the fire. If they only knew what this pot of water was going to be used for, they wouldn't be hanging around. For some reason, this makes me think of Bugs Bunny and the episode where he is about to be made into "Hossenfeffer". I don't know how that is spelled. But does anyone remember that. The cook lures Bugs Bunny into the pot of hot water and Bugs doesn't realize he is about to be cooked. Do you remember "Bring me my Hossenfeffer!"
The photos I am about to show you are not meant to offend and be cruel. Also, I kept the more graphic photos away. Like, there are no photos of the chicken getting it's head cut off, so don't worry! I wanted to share with you the process of butchering a chicken. There is one part that was not photographed and that was the part where we gutted the chicken. Mostly the reason for this is our photographer which was our 13 year old neighbor took off with our boys to go ride bicycles. I was the one taking photos in the beginning, and then once I started to help with pulling the feathers, he took over.

In the photo above, the chicken is placed through a plastic milk jug. The bottom of the milk jug is cut off and the neck of the milk jugs is cut wider for the chicken's head to fit through. Putting the chicken into the plastic milk jug helps to keep his wings from flapping around like crazy after you cut the main artery in his neck to bleed him out. Also the handle on the milk jug is very helpful. You can have one hand on the handle of the jug and the other hand is holding the chickens legs just above the feet.

In the photo below, you can see my husband trying to feel for the pulse in the chicken's neck. This was a tip we found on the Internet. He never could feel it and had to go with gut instinct. As I mentioned, this was our very first time doing this and everything was a learning process.

I'm not going to show photos of the chicken hanging upside down and bleeding out...no...no...no...I'm not going to do that. So, I moved on to the next step. Once the chicken is pretty well bled out and completely dead, you dunk them in very hot water for about 8 seconds making sure to get all of their feathers wet. This process will insure that the feathers will come out very easily.

Here's me plucking feathers which, to my surprise, came out very easily. Notice the look on my face. That's pretty much how I looked from beginning to end of the whole experience.

Out of respect for the chicken, I blurred out his face and cut neck. I feel like this chicken is on an episode of "Cops". We hadn't cut off his head at this point, but we could have.

You can see behind me is a garbage can where we threw all of the feathers.

My husband hosed off the chicken after we felt we felt we got all of the feathers off.

In the photo below, we had started on our second chicken. This time I was the one holding the chicken in the milk jug instead of my son. I wanted to be part of the experience and I wanted to learn. However, I did not do any of the cutting. I could have if I wanted to. I kinda wanted to because like I said, I want to learn and have the experience of doing the whole process. I just couldn't bring myself to do it, so all of that was up to my husband.

Here you can see we threw the chickens in an ice bath in a cooler. There were completely plucked of all feathers and their head cut off.

By the time we got to the third chicken, we realized we should have cut the bottom half of the legs off before we put them in the ice bath. My reasoning for this was because of the dirt on the chickens feet. I just think it would be cleaner. So we pulled the other chickens out and cut the bottom of their legs off and then put them back in the cooler.
The only other thing we didn't do, which isn't a big deal is...we didn't singe off the tiny little hairs that are on the skin of the chicken. You can do this with an outdoor gas burner. You just quickly and briefly hold the chicken over the fire and singe off any tiny hairs. We decided that since we would be cooking our chickens on the grill, we didn't need to do this step.
At this point, the chickens had not been gutted. We decided this would be a good time for us to take a break, throw away the gloves, go in and wash our hands, and get something to drink.
We had no idea how well it would go with the gutting process, but it went just fine. There are no photos of this process, but that's ok, I have photos in my mind. It was a little gross and freaky pulling out the intestines and stomach and the heart and lungs and kidneys...etc. Basically you cut a slit in the anterior of the chicken at his bum big enough for you to put your hand in there. You have to be very careful to not cut into the intestines. If you do, it's not a bad thing, you just want to make sure you rinse the chicken very well. Anyhow, my husband did good and never cut the intestines.
As strange as it may seem...all you do is put your hand inside the chicken and start pulling everything out. It comes out fairly easily, but there is some suction working against you. Once everything comes out, and you look inside, it looks just like you would think....just like the chickens or turkeys you buy at the store that have already been cleaned for you. The very last thing to come out of the chickens were the lungs. My husband had me check each chicken to see if I could feel anything left. I did, but I could barely tell, I kinda had to dig my fingers down into the rib cage far up inside of the bird. There I found the lungs and kinda had to dig each one out with my fingers. I only knew this from watching the video I saw on YouTube. I am so glad we watched that video. It was very helpful.
In the photo below, you can see the finished product. What a beautiful bird! Once inside, at the kitchen sink, I rinsed the bird well and dabbed it dry with a towel. I then double bagged it in two one gallon freezer bags and placed them in the freezer.

I was very proud of us when it was all over. We researched how to do this and actually did it! It was a good feeling. I felt like an Ole' farm wife! Well, you've read my profile...I'm a wanna be farm girl! Now I'm one step closer!

It was a little nerve racking for my husband and I, for this was our very first time to process chickens. Process sounds a little better than butcher, and butcher sounds a little better than slaughter...what can I say. It was one of those things...it had to be done...it was time...and there was no turning back. We took the whole process very seriously, researched the process on the Internet and watched tutorial videos on YouTube prior to the big day.

We did everything as respectful and humanely as we thought we could. It is not as if we take pleasure in killing a chicken, but this is how our forefathers lived and we have a lot of respect for learning how to live without Mr. Grocery Store. It is definitely an interesting process and I have much respect for people who lived off the land...and there, of course, are still people who live off the land. There's something to be said for learning basic survival skills. I love it.

This photo makes me laugh because the little 8 week old egg layers came over for a look at the pot of steaming water over the fire. If they only knew what this pot of water was going to be used for, they wouldn't be hanging around. For some reason, this makes me think of Bugs Bunny and the episode where he is about to be made into "Hossenfeffer". I don't know how that is spelled. But does anyone remember that. The cook lures Bugs Bunny into the pot of hot water and Bugs doesn't realize he is about to be cooked. Do you remember "Bring me my Hossenfeffer!"
The photos I am about to show you are not meant to offend and be cruel. Also, I kept the more graphic photos away. Like, there are no photos of the chicken getting it's head cut off, so don't worry! I wanted to share with you the process of butchering a chicken. There is one part that was not photographed and that was the part where we gutted the chicken. Mostly the reason for this is our photographer which was our 13 year old neighbor took off with our boys to go ride bicycles. I was the one taking photos in the beginning, and then once I started to help with pulling the feathers, he took over.

In the photo above, the chicken is placed through a plastic milk jug. The bottom of the milk jug is cut off and the neck of the milk jugs is cut wider for the chicken's head to fit through. Putting the chicken into the plastic milk jug helps to keep his wings from flapping around like crazy after you cut the main artery in his neck to bleed him out. Also the handle on the milk jug is very helpful. You can have one hand on the handle of the jug and the other hand is holding the chickens legs just above the feet.

In the photo below, you can see my husband trying to feel for the pulse in the chicken's neck. This was a tip we found on the Internet. He never could feel it and had to go with gut instinct. As I mentioned, this was our very first time doing this and everything was a learning process.

I'm not going to show photos of the chicken hanging upside down and bleeding out...no...no...no...I'm not going to do that. So, I moved on to the next step. Once the chicken is pretty well bled out and completely dead, you dunk them in very hot water for about 8 seconds making sure to get all of their feathers wet. This process will insure that the feathers will come out very easily.

Here's me plucking feathers which, to my surprise, came out very easily. Notice the look on my face. That's pretty much how I looked from beginning to end of the whole experience.

Out of respect for the chicken, I blurred out his face and cut neck. I feel like this chicken is on an episode of "Cops". We hadn't cut off his head at this point, but we could have.

You can see behind me is a garbage can where we threw all of the feathers.

My husband hosed off the chicken after we felt we felt we got all of the feathers off.

In the photo below, we had started on our second chicken. This time I was the one holding the chicken in the milk jug instead of my son. I wanted to be part of the experience and I wanted to learn. However, I did not do any of the cutting. I could have if I wanted to. I kinda wanted to because like I said, I want to learn and have the experience of doing the whole process. I just couldn't bring myself to do it, so all of that was up to my husband.

Here you can see we threw the chickens in an ice bath in a cooler. There were completely plucked of all feathers and their head cut off.

By the time we got to the third chicken, we realized we should have cut the bottom half of the legs off before we put them in the ice bath. My reasoning for this was because of the dirt on the chickens feet. I just think it would be cleaner. So we pulled the other chickens out and cut the bottom of their legs off and then put them back in the cooler.
The only other thing we didn't do, which isn't a big deal is...we didn't singe off the tiny little hairs that are on the skin of the chicken. You can do this with an outdoor gas burner. You just quickly and briefly hold the chicken over the fire and singe off any tiny hairs. We decided that since we would be cooking our chickens on the grill, we didn't need to do this step.
At this point, the chickens had not been gutted. We decided this would be a good time for us to take a break, throw away the gloves, go in and wash our hands, and get something to drink.
We had no idea how well it would go with the gutting process, but it went just fine. There are no photos of this process, but that's ok, I have photos in my mind. It was a little gross and freaky pulling out the intestines and stomach and the heart and lungs and kidneys...etc. Basically you cut a slit in the anterior of the chicken at his bum big enough for you to put your hand in there. You have to be very careful to not cut into the intestines. If you do, it's not a bad thing, you just want to make sure you rinse the chicken very well. Anyhow, my husband did good and never cut the intestines.
As strange as it may seem...all you do is put your hand inside the chicken and start pulling everything out. It comes out fairly easily, but there is some suction working against you. Once everything comes out, and you look inside, it looks just like you would think....just like the chickens or turkeys you buy at the store that have already been cleaned for you. The very last thing to come out of the chickens were the lungs. My husband had me check each chicken to see if I could feel anything left. I did, but I could barely tell, I kinda had to dig my fingers down into the rib cage far up inside of the bird. There I found the lungs and kinda had to dig each one out with my fingers. I only knew this from watching the video I saw on YouTube. I am so glad we watched that video. It was very helpful.
In the photo below, you can see the finished product. What a beautiful bird! Once inside, at the kitchen sink, I rinsed the bird well and dabbed it dry with a towel. I then double bagged it in two one gallon freezer bags and placed them in the freezer.

I was very proud of us when it was all over. We researched how to do this and actually did it! It was a good feeling. I felt like an Ole' farm wife! Well, you've read my profile...I'm a wanna be farm girl! Now I'm one step closer!
Subscribe to:
Posts (Atom)