Hello everyone! Happy Valentine's Day! There was so much more that I wanted to post before Valentine's Day rolled around....but as it happened...I got sick, like really sick! Like aching from head to toe sick, fever and chills for 3 days, sore throat, swollen tonsils, down and out, laid up, the whole nine yards. I started getting sick late Monday night, went to the doctors Thursday, got a steroid shot in the arm to help the swelling in my throat go down and also got some antibiotics. By Friday, things were looking up. Saturday, even better. Sunday, I got up early, took a shower, ate breakfast and we all went to church. I think I am back to normal today. I have one more day of antibiotic. I have to say, that was the sickest I have been in a looooooong time! I even cried twice during my illness. The ache was so bad, I just had to hang in there and take it. I was taking ibuprofen 'round the clock every four hours. When I would try to wait longer, it just made it worse. I already had a real appreciation for life and health before I got sick, and this reminded me all the more to enjoy life while you have it and enjoy your health, cause you may not always be blessed to have it. I am happy I am better and ready to get back to blogging. I had promised at the end of my last post to write about stained glass heart shaped cookies. I was prepared...I had all my ingredients purchased, but now it's too late. I think maybe I will showcase these cookies for St Patrick's Day or Easter.
February 14, 2011
Sick Days
Hello everyone! Happy Valentine's Day! There was so much more that I wanted to post before Valentine's Day rolled around....but as it happened...I got sick, like really sick! Like aching from head to toe sick, fever and chills for 3 days, sore throat, swollen tonsils, down and out, laid up, the whole nine yards. I started getting sick late Monday night, went to the doctors Thursday, got a steroid shot in the arm to help the swelling in my throat go down and also got some antibiotics. By Friday, things were looking up. Saturday, even better. Sunday, I got up early, took a shower, ate breakfast and we all went to church. I think I am back to normal today. I have one more day of antibiotic. I have to say, that was the sickest I have been in a looooooong time! I even cried twice during my illness. The ache was so bad, I just had to hang in there and take it. I was taking ibuprofen 'round the clock every four hours. When I would try to wait longer, it just made it worse. I already had a real appreciation for life and health before I got sick, and this reminded me all the more to enjoy life while you have it and enjoy your health, cause you may not always be blessed to have it. I am happy I am better and ready to get back to blogging. I had promised at the end of my last post to write about stained glass heart shaped cookies. I was prepared...I had all my ingredients purchased, but now it's too late. I think maybe I will showcase these cookies for St Patrick's Day or Easter.
February 4, 2011
February Rain and Tissue Paper Flowers

A rainy Saturday afternoon.
Wet heavy snow fills the yard.
The air is cold and damp.
Water soaked branches are black against the sky.
Tip tap, tip tap...rain falls on my parka.
Icy cold hands.
Where are my mittens?
Tis February again.
*poem written by me, Bonnie*
The weather and photo I took today inspired the poem I just wrote. I'm feeling quite nostalgic and lovey today. The dripping drops have not got me down. Instead, I was photographing in the rain.
Once inside, I made one of my very favorite crafts; tissue paper flowers.

This craft is timeless...I've been making these since I was a little girl. What a great decoration for Valentines Day...giant puffy fluffy pink tissue flowers. I love these flowers, they always bring a smile to my face and they're very easy to make!
So what would one DO, with a soft puffy fluffy tissue flower?
Well, you can use them as centerpieces for a baby shower or bridal shower.
You could also decorate with these flowers for any holiday...most definitely Valentine's day!
I hung my pink paper flower on my front door. I think it looks very quaint!

Here's a visual, step by step tutorial.


measure and cut a 12 x 12 square cutting through all layers of paper. You can make any size flower you want by cutting smaller squares.

make accordian folds, back and forth, back and forth, the whole way through the square.


All of the layers are so beautiful and fluffy!

Pink or red tissue, you could make garland or put two together to make a pom pom. Make smaller ones and glue them on handmade napkin rings for a Valentine tea party. Decorate a heart shaped box filled with chocolate. I better stop before I get carried away...

...carried away on a big pink fluffy puffy flower!

Stay tuned: up next, stained glass heart shaped cookies....oh so yummy!
February 3, 2011
BBQ Chicken Pizza
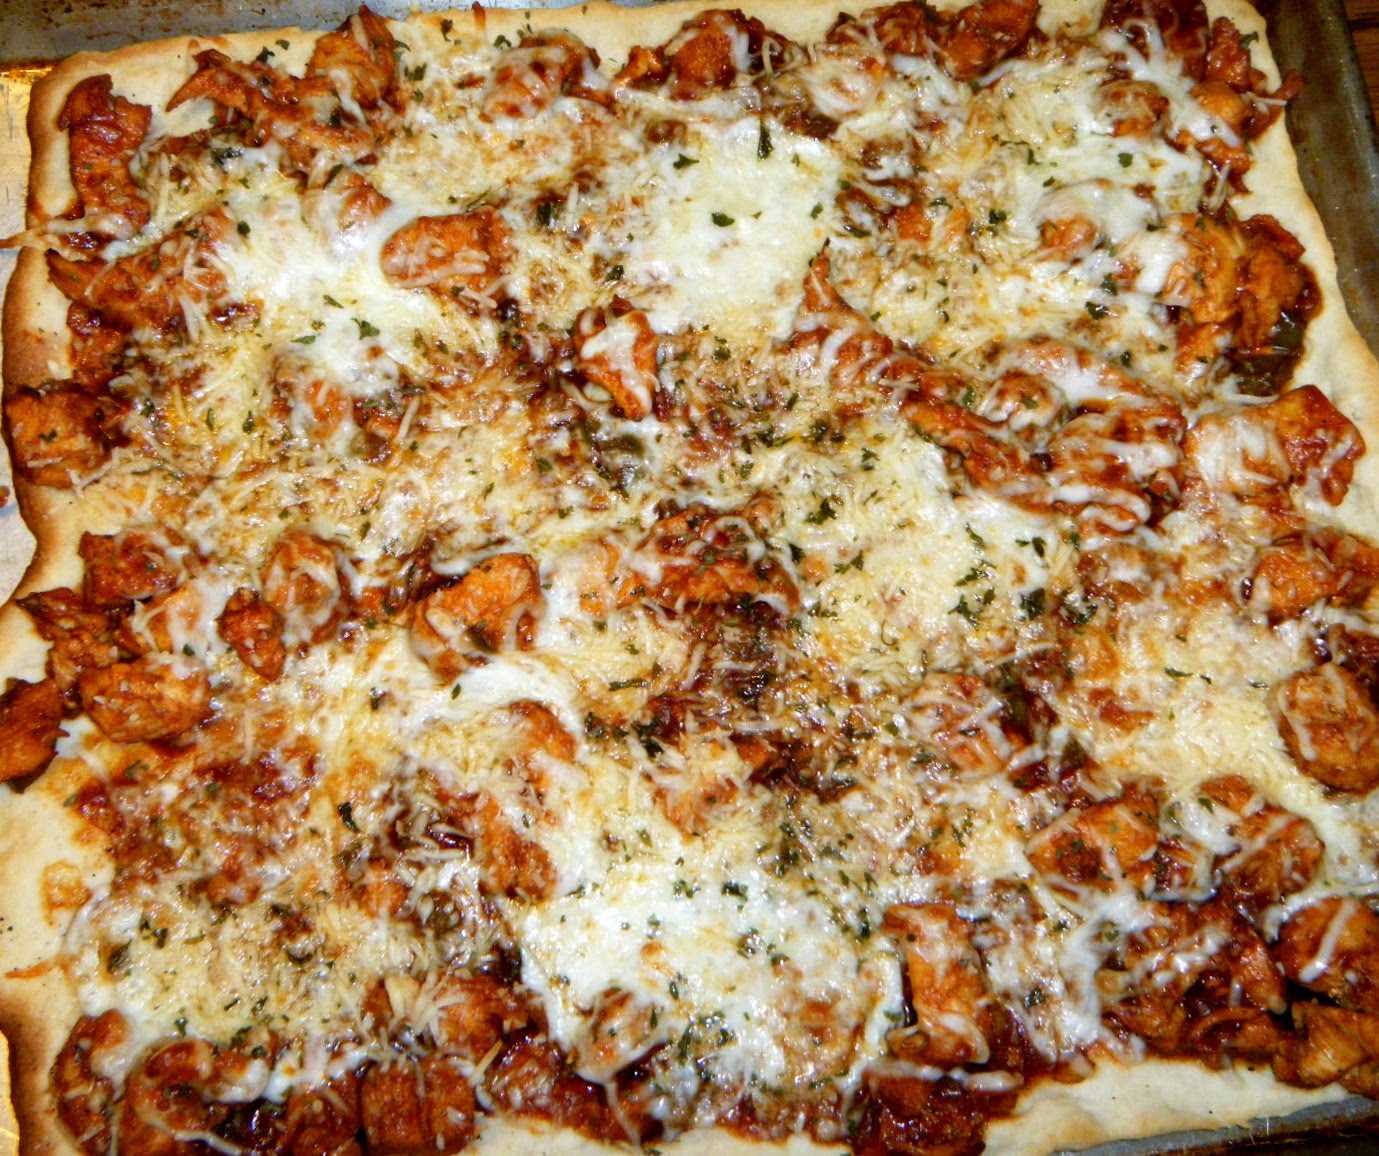
Every once in a while I get the craving for some good BBQ chicken pizza!! Let me tell you, it is such an easy dinner to make. The crust is very versatile. You can use anything from homemade dough, to ready made par-baked store bought crust, pita bread rounds, or an inexpensive packet of dough mix for about 50 cents. Sometimes, I make my decision for the crust based on what's already in my pantry.
For the topping, you need cooked chopped chicken, diced onion and green pepper, minced garlic and a really good, smokey BBQ sauce.
Start with a really good BBQ sauce! This is my favorite BBQ sauce. It is so smokey and just a little bit sweet!
For the topping, you need cooked chopped chicken, diced onion and green pepper, minced garlic and a really good, smokey BBQ sauce.
Start with a really good BBQ sauce! This is my favorite BBQ sauce. It is so smokey and just a little bit sweet!
So here's the process...it's really easy!
In a small saucepan heat a little butter or margarine and saute a handful each of diced onion and green pepper. Mince a few cloves of garlic and add that as well. Cook until just softened.
Add onion and pepper mixture to BBQ sauce and simmer in a pan for a few minutes.
Add the chopped chicken and simmer a few minute to incorporate all the wonderful flavors.
Spoon the smokey chicken and sauce over pizza crust.
I chose to use a very quick and easy crust...a packet of dough mix from Wal Mart for 5o cents. All you do is mix the contents of the packet with water, form a ball, let rest for 5 minutes and then push dough into shape of your pan. Next you pre-bake the crust for 9 minutes and you're ready to put your toppings on!
Sprinkle with shredded mozzarella cheese and shredded Parmesan cheese.
Bake at 425 degrees for 9 minutes.
Cool, slice and enjoy!
Oh yum!
This is GOOD stuff!!!
February 2, 2011
Shrinky Dinks Valentine Garland
My youngest son had a fever over the weekend. I could tell he was getting a little restless, as he was not completely down and out. Wondering what we could do that was different and fun, I came across shrinky dinks on a blog that I frequent. Oh, I was so excited! I loved shrinky dinks when I was a kid...certainly my child would be just as amazed as I had. By the way, I tried to go back and find the post so I could give credit to them for inspiring me, but I couldn't find it...sorry whoever you are!
My son and I had fun creating cute little monsters, bumblebees and butterflies.

Just a quick little lesson on shrinky dinks for any of you that don't know what I'm talking about.

Ok, now that we got that out of the way...
I did a before and after photo using a quarter for size reference.

To shrink the shrinky dinks, you bake them in a toaster oven or a regular oven following the manufacturer's instructions. My instructions said to bake at 325 for 3 minutes.

They'll shrink up about 50%. We baked them on a baking sheet lined with brown paper bag. My son and I watched them curl up and then flatten during the shrinking process. It's so fun to watch! I used to love this part when I was a kid!

I wanted to make some sort of Valentine decoration with our creations, so I decided to make a sweet, little garland to hang in my kitchen window.
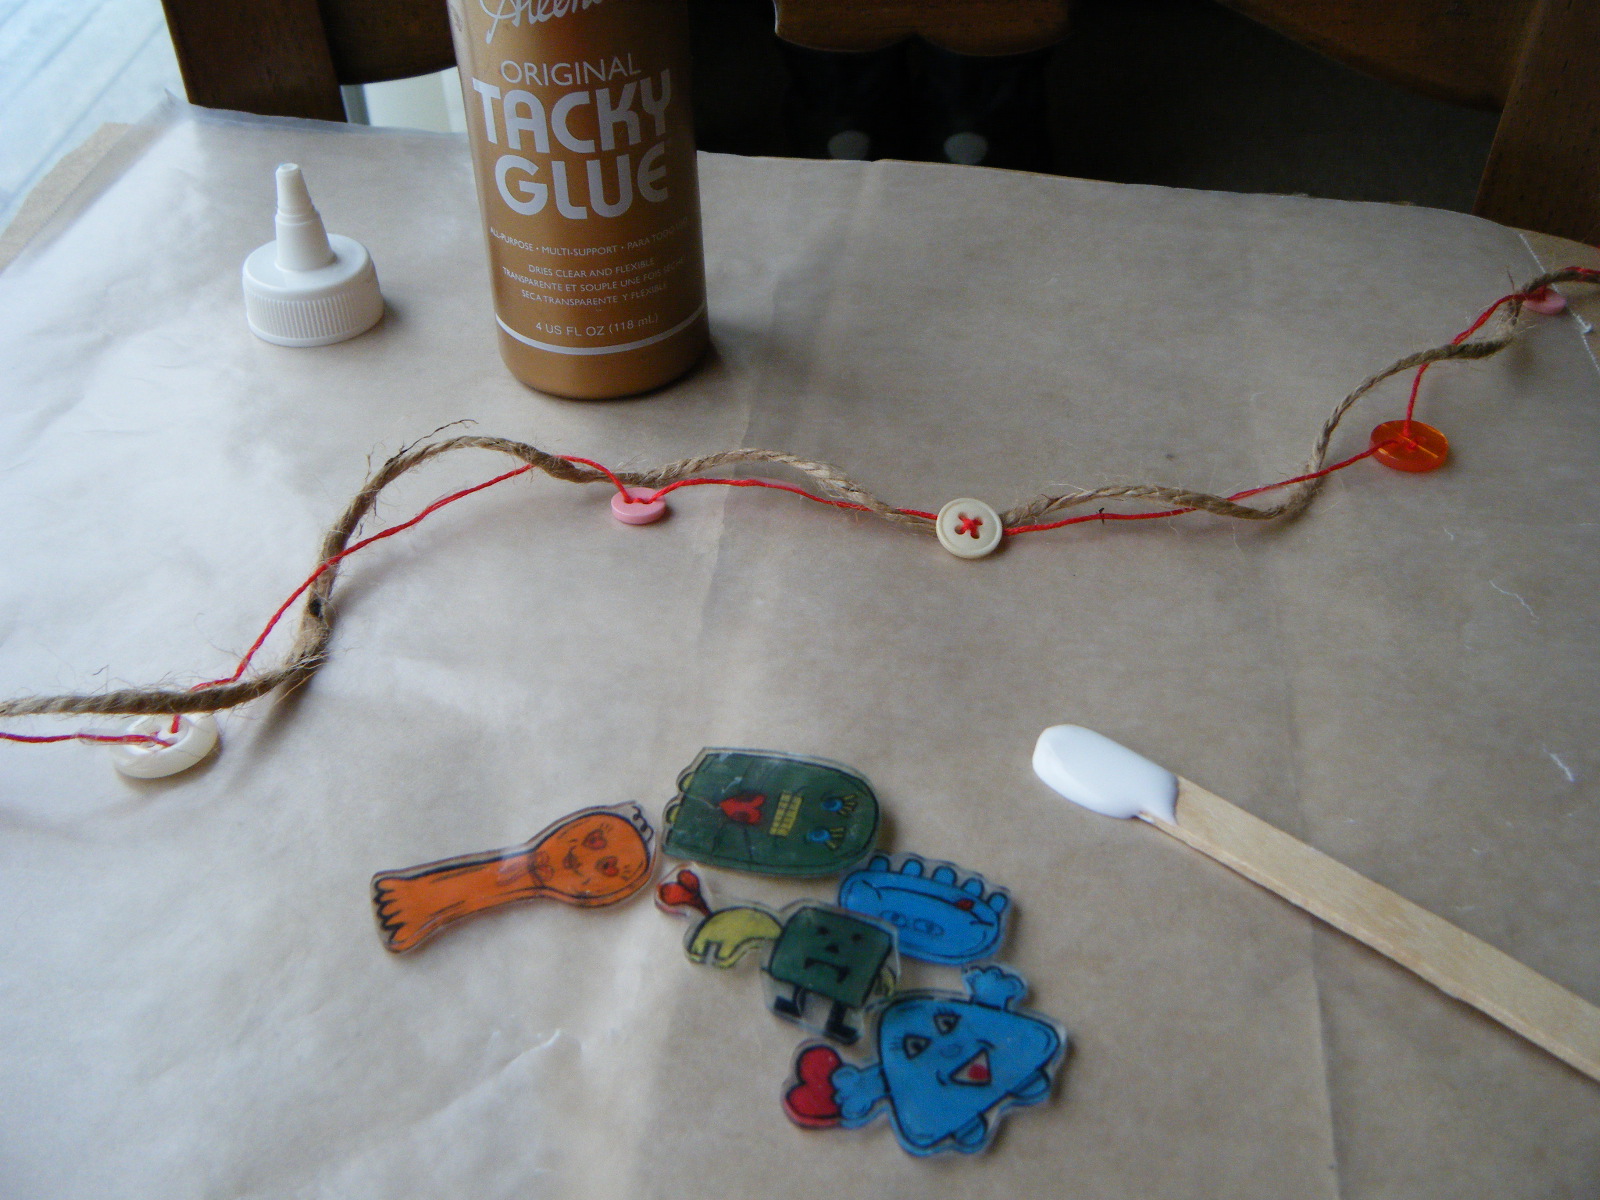
First, I sewed random buttons on to a few strands of red embroidery thread.

Then I grabbed twine from my husband's workshop.

I wrapped the button thread around a piece of twine to give it an added dimension of interest and texture.

Some craft glue and my shrinky dinks, and I was ready!

A little glob of glue...

position the green little monster on the twine...and let dry!

a little orange monster!

a little blue monster!

another little green monster! My son made this one...it's so cute! he's got one small yellow arm and one giant yellow arm!

I let the little monsters hang out and dry...

...and hung them in my kitchen window!

I think it's kinda cute! I love Valentine's Day! It gives me a warm fuzzy feeling inside...hearts, candy, love, paper valentines, love notes!
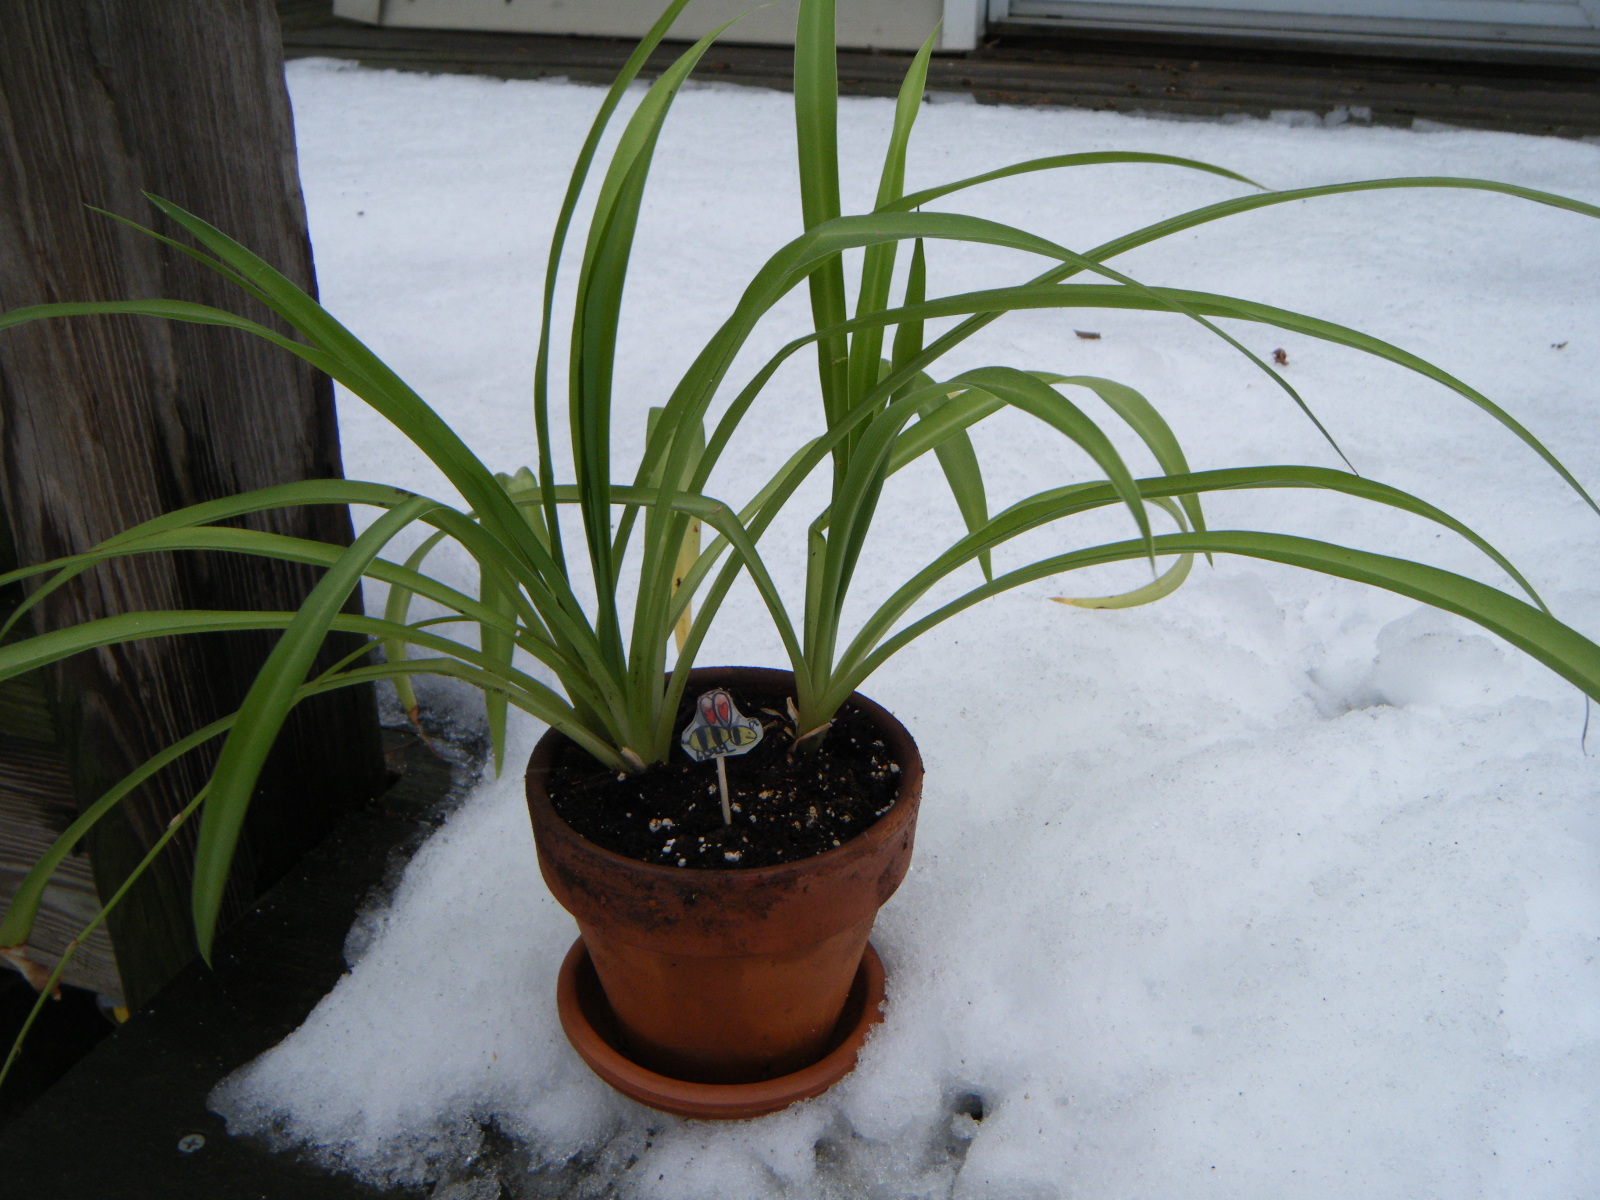
For the sweet little bumblebee my son made, I made a plant pick. I simply took craft glue and adhered a toothpick to the back side of the bee. Easy stuff here people!

It's overcast right now, and not too much natural light in my house, so I brought my plant out into the shivering cold to take a photo...poor little plant!

Dang, I think this bumblebee is my favorite of all!

But then again, there IS this cute little arm with a tattoo heart that my son also made.

This just cracked me up! How did he come up with this? I can't decide what to do with this piece. I gotta think a little bit more on this one!
My son and I had fun creating cute little monsters, bumblebees and butterflies.

Just a quick little lesson on shrinky dinks for any of you that don't know what I'm talking about.

Ok, now that we got that out of the way...
I did a before and after photo using a quarter for size reference.

To shrink the shrinky dinks, you bake them in a toaster oven or a regular oven following the manufacturer's instructions. My instructions said to bake at 325 for 3 minutes.

They'll shrink up about 50%. We baked them on a baking sheet lined with brown paper bag. My son and I watched them curl up and then flatten during the shrinking process. It's so fun to watch! I used to love this part when I was a kid!

I wanted to make some sort of Valentine decoration with our creations, so I decided to make a sweet, little garland to hang in my kitchen window.
First, I sewed random buttons on to a few strands of red embroidery thread.

Then I grabbed twine from my husband's workshop.
I wrapped the button thread around a piece of twine to give it an added dimension of interest and texture.
Some craft glue and my shrinky dinks, and I was ready!
A little glob of glue...
position the green little monster on the twine...and let dry!
a little orange monster!
a little blue monster!
another little green monster! My son made this one...it's so cute! he's got one small yellow arm and one giant yellow arm!
I let the little monsters hang out and dry...
...and hung them in my kitchen window!
I think it's kinda cute! I love Valentine's Day! It gives me a warm fuzzy feeling inside...hearts, candy, love, paper valentines, love notes!
For the sweet little bumblebee my son made, I made a plant pick. I simply took craft glue and adhered a toothpick to the back side of the bee. Easy stuff here people!

It's overcast right now, and not too much natural light in my house, so I brought my plant out into the shivering cold to take a photo...poor little plant!
Dang, I think this bumblebee is my favorite of all!
But then again, there IS this cute little arm with a tattoo heart that my son also made.
This just cracked me up! How did he come up with this? I can't decide what to do with this piece. I gotta think a little bit more on this one!
February 1, 2011
Hershey's Chocolate Cupcakes
bakerina the baking ballerina I could not refrain from baking another second!
I turned to my Hershey's cookbook and found a recipe for chocolate cupcakes.
Homemade cupcakes are the only way to go!
The cake is so much more dense and flavorful compared to that of a box mix.
If you're in the mood for a good chocolate cupcake, give these a try!
HERSHEY'S CHOCOLATE CUPCAKES
3 squares (3 oz.) HERSHEY'S unsweetened baking chocolate
1/2 cup butter, softened
1 cup sugar
2 eggs, separated
2 cups cake flour* (see substitution tip below)
1 1/2 tsp. baking powder
3/4 tsp. baking soda
1/4 tsp. salt
2/3 cup milk
1 tsp. vanilla extract
Heat oven to 350 degrees. Paper line muffin cups. In top of double boiler over hot, not boiling, melt chocolate. Set aside to cool slightly. In large mixer bowl, beat butter and sugar until light and fluffy. Add egg yolks, beat well. Add chocolate, beat until blended. Stir together flour, baking powder, baking soda and salt; add alternately with milk to butter mixture, beating until well blended. Stir in vanilla. In small mixer bowl, beat egg whites until stiff; fold into batter. Fill prepared muffin cups half full with batter. Bake 15 to 20 minutes or until wooden pick inserted in center comes out clean. Remove from pan to wire racks. Cool completely . Frost with Vanilla Butter Icing.
*Tip* Substitution for cake flour: for each 1 cup cake flour, measure 2 Tbsp. cornstarch into 1 cup measuring cup and fill rest with flour. Sift flour along with the cornstarch to add air to flour. If you don't have a sifter, you can fluff up flour with a fork or whisk.
VANILLA BUTTER ICING
6 tbsp. butter, softened
3 cups powdered sugar
2 to 4 tbsp. milk
3 tsp. vanilla extract
few drops food coloring, optional
In small mixer bowl, beat butter and sugar until light and fluffy; add milk and vanilla, beating until smooth and of spreading consistency.
I turned to my Hershey's cookbook and found a recipe for chocolate cupcakes.
Homemade cupcakes are the only way to go!
The cake is so much more dense and flavorful compared to that of a box mix.
If you're in the mood for a good chocolate cupcake, give these a try!
HERSHEY'S CHOCOLATE CUPCAKES
3 squares (3 oz.) HERSHEY'S unsweetened baking chocolate
1/2 cup butter, softened
1 cup sugar
2 eggs, separated
2 cups cake flour* (see substitution tip below)
1 1/2 tsp. baking powder
3/4 tsp. baking soda
1/4 tsp. salt
2/3 cup milk
1 tsp. vanilla extract
Heat oven to 350 degrees. Paper line muffin cups. In top of double boiler over hot, not boiling, melt chocolate. Set aside to cool slightly. In large mixer bowl, beat butter and sugar until light and fluffy. Add egg yolks, beat well. Add chocolate, beat until blended. Stir together flour, baking powder, baking soda and salt; add alternately with milk to butter mixture, beating until well blended. Stir in vanilla. In small mixer bowl, beat egg whites until stiff; fold into batter. Fill prepared muffin cups half full with batter. Bake 15 to 20 minutes or until wooden pick inserted in center comes out clean. Remove from pan to wire racks. Cool completely . Frost with Vanilla Butter Icing.
*Tip* Substitution for cake flour: for each 1 cup cake flour, measure 2 Tbsp. cornstarch into 1 cup measuring cup and fill rest with flour. Sift flour along with the cornstarch to add air to flour. If you don't have a sifter, you can fluff up flour with a fork or whisk.
VANILLA BUTTER ICING
6 tbsp. butter, softened
3 cups powdered sugar
2 to 4 tbsp. milk
3 tsp. vanilla extract
few drops food coloring, optional
In small mixer bowl, beat butter and sugar until light and fluffy; add milk and vanilla, beating until smooth and of spreading consistency.
P.S. I'm in a Valentiney Mood!
I've got lots of projects to share with you!
Stay tuned tomorrow for my Shrinky Dinks Valentine garland.
It's just the right size for a small kitchen window!
Subscribe to:
Posts (Atom)